How to train flux lora using comfyui on vast.ai?
Posted on October 22, 2024 - Tutorials

Hey there! 👋
I've spent countless hours training LoRA models, and lemme tell you - it's way simpler than most people make it sound. Today I'm gonna show you exactly how to train your own LoRA model using FLUX.1 and Vast.ai.
Why Should You Care About FLUX.1?
FLUX.1 is blowing up right now, and for good reason.
Think of it as your creative Swiss Army knife - it can generate almost anything you throw at it. But here's the cool part: with LoRA training, you can teach it to be even better at specific things.
Getting Your Dataset Ready
Here's the deal with datasets:
- You'll need at least 10-20 images
- Make sure you've got the rights to use these images
Pro tip: Don't just grab random images off Google. You might run into copyright issues. Use proper databases or open-source collections.
The Step-by-Step Training Process
1. Getting Your Hands on a GPU
Look, I'll be straight with you - you need some serious hardware for this.
Two main options:
- Rent from Vast.ai (my go-to)
- Use your own setup if you've got a beefy GPU
What you need:
- RTX 3060, 3090 or 4090 (don't even bother with less)
- At least 8GB VRAM
Here's how to get started on Vast.ai:
- Create an account
- Pick a template with the right GPU
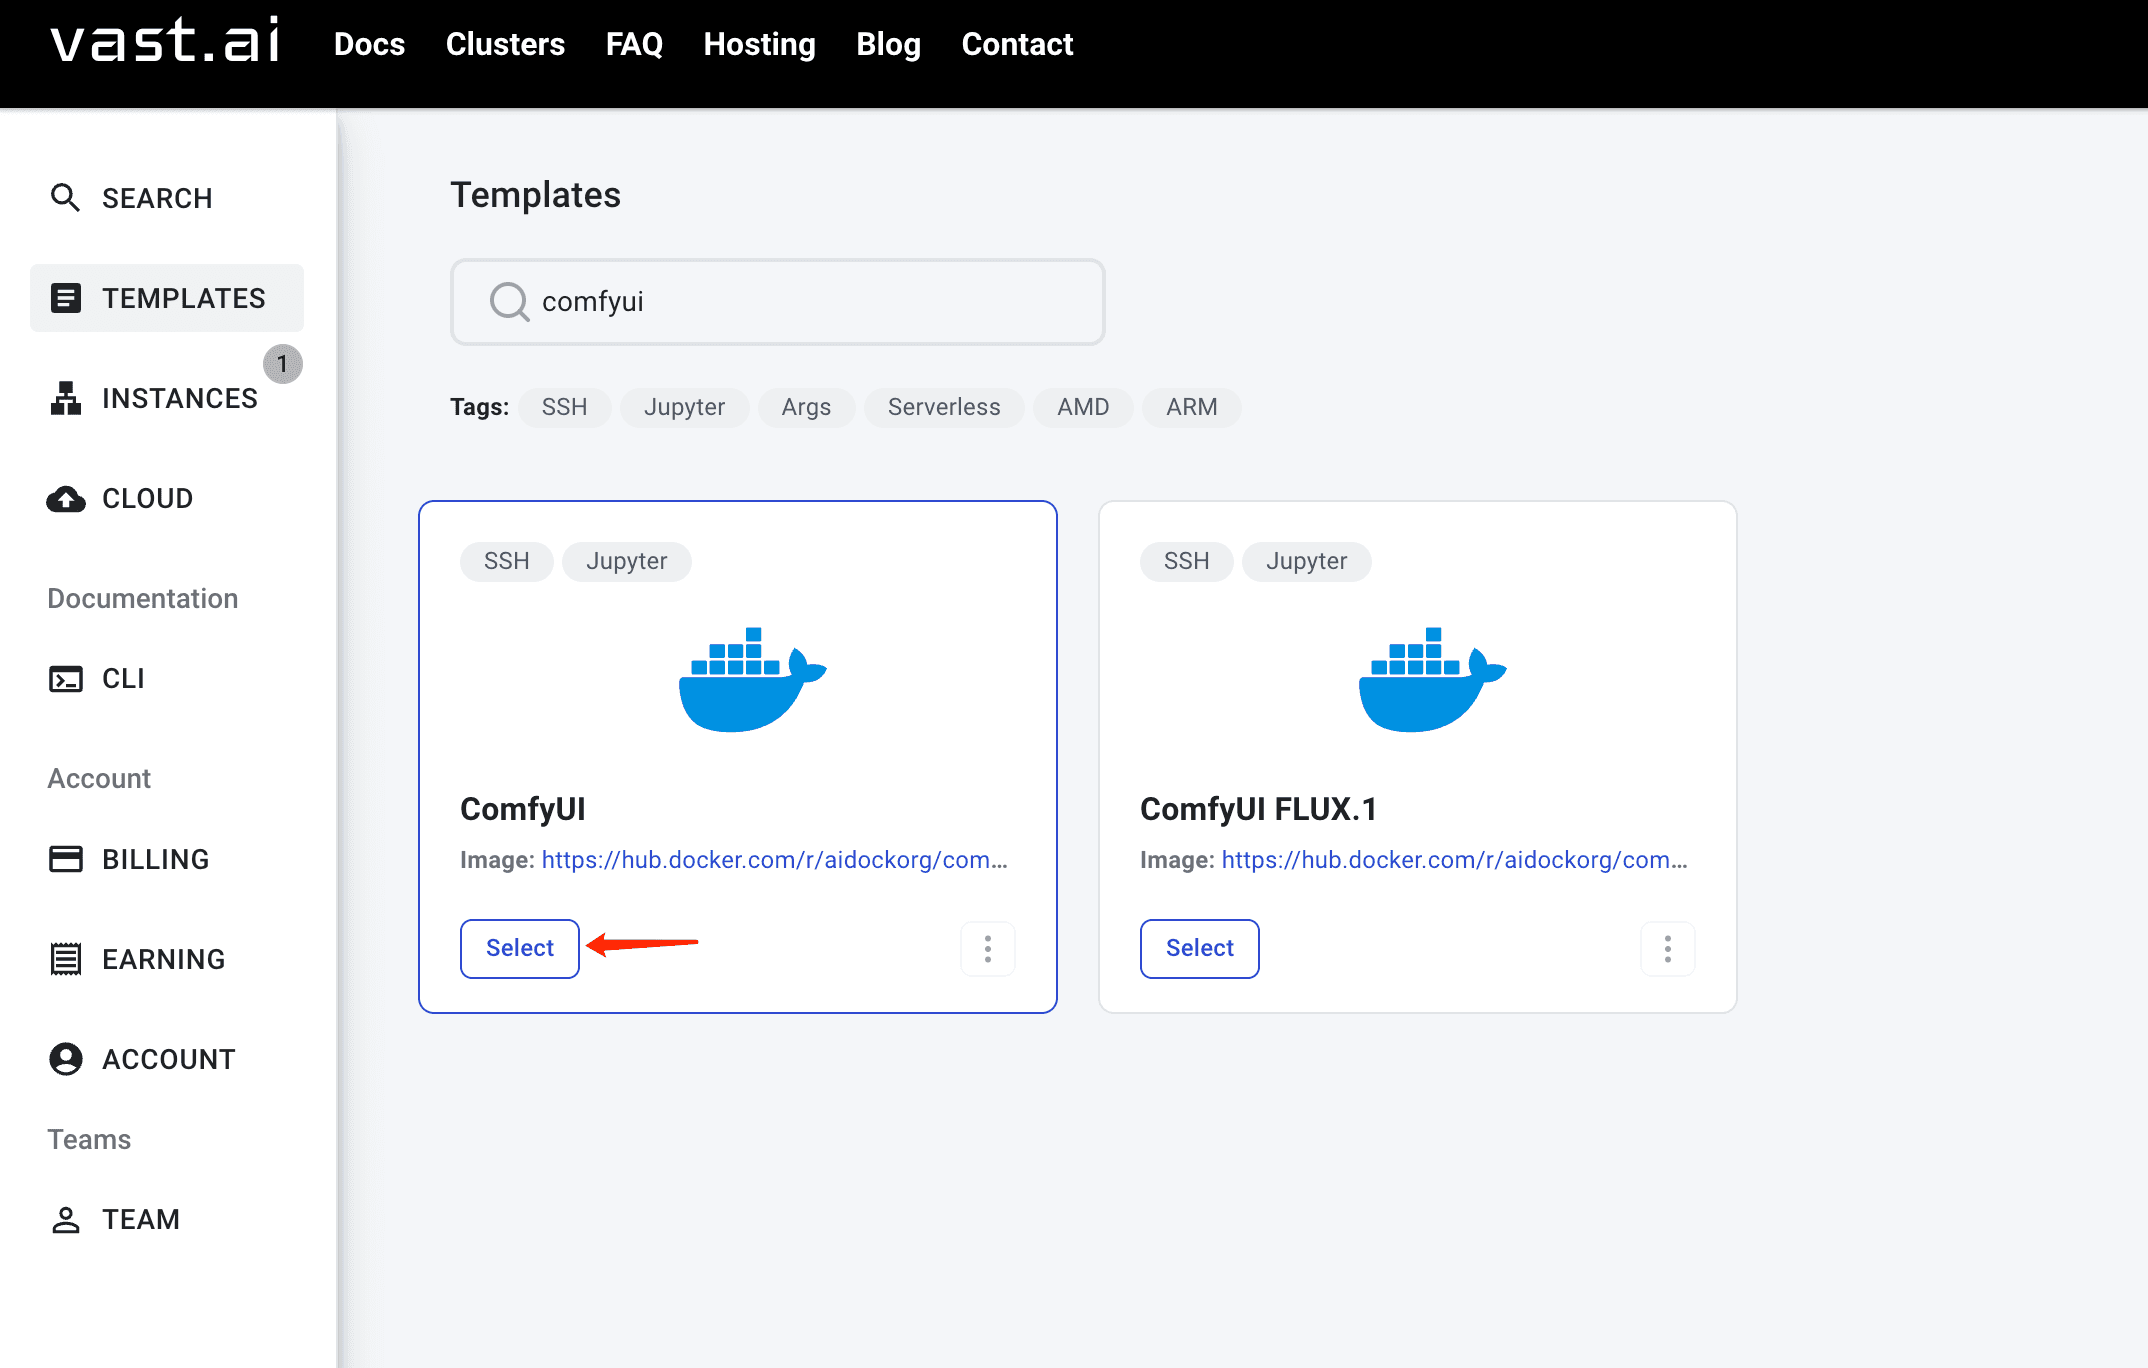
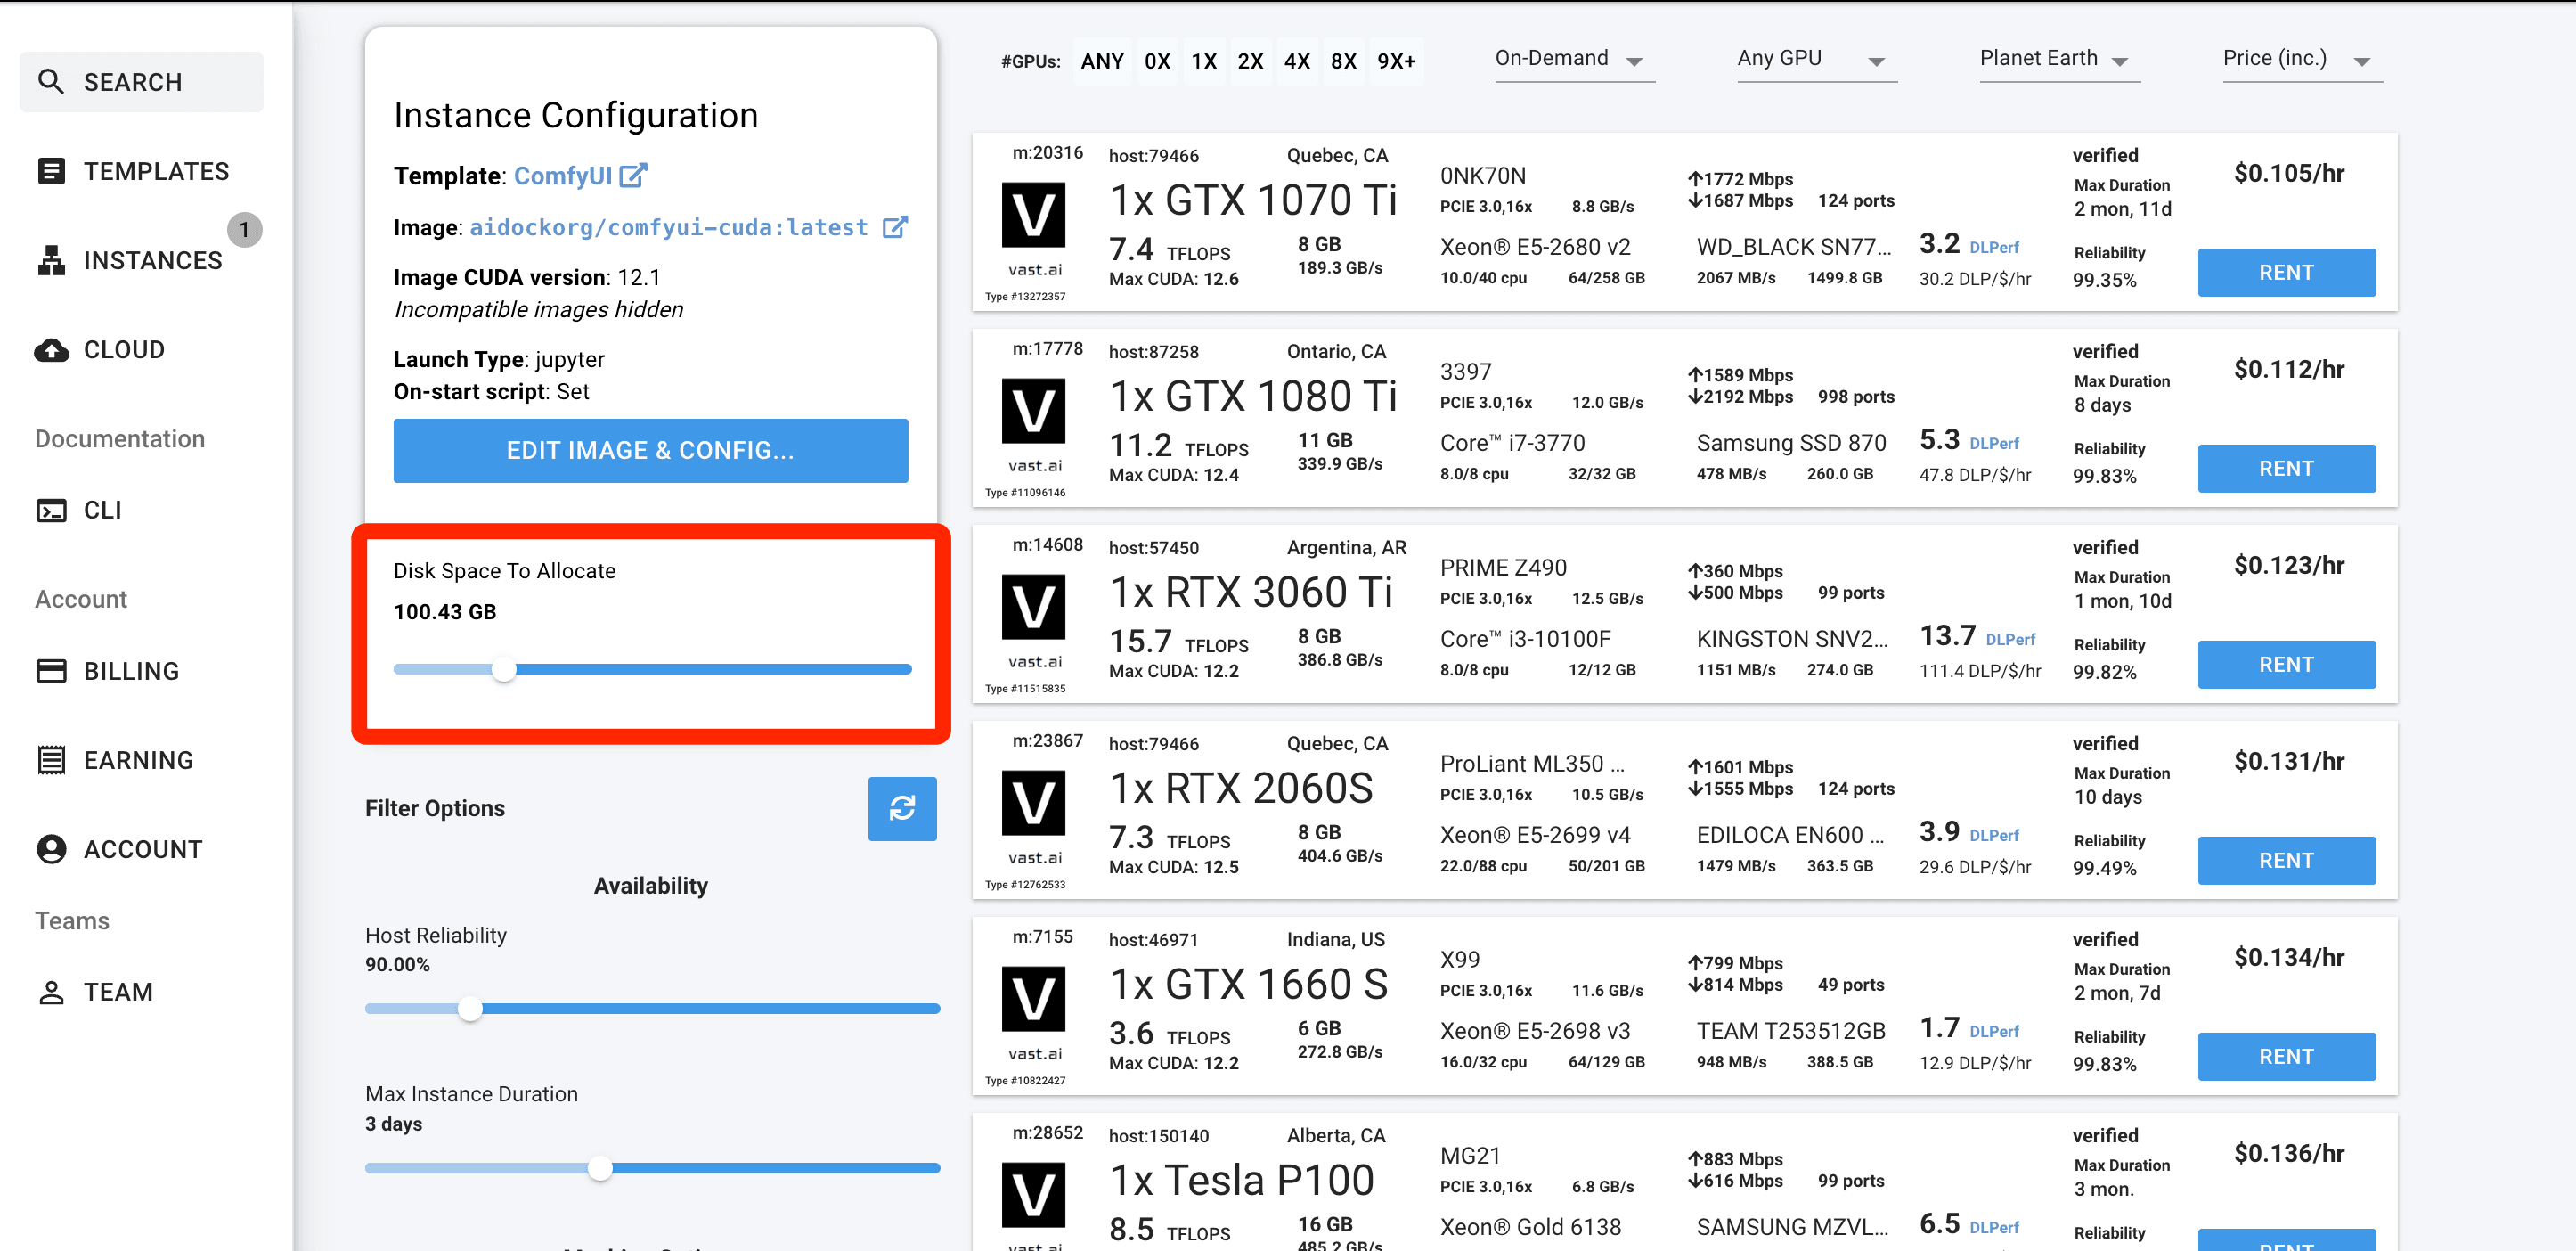
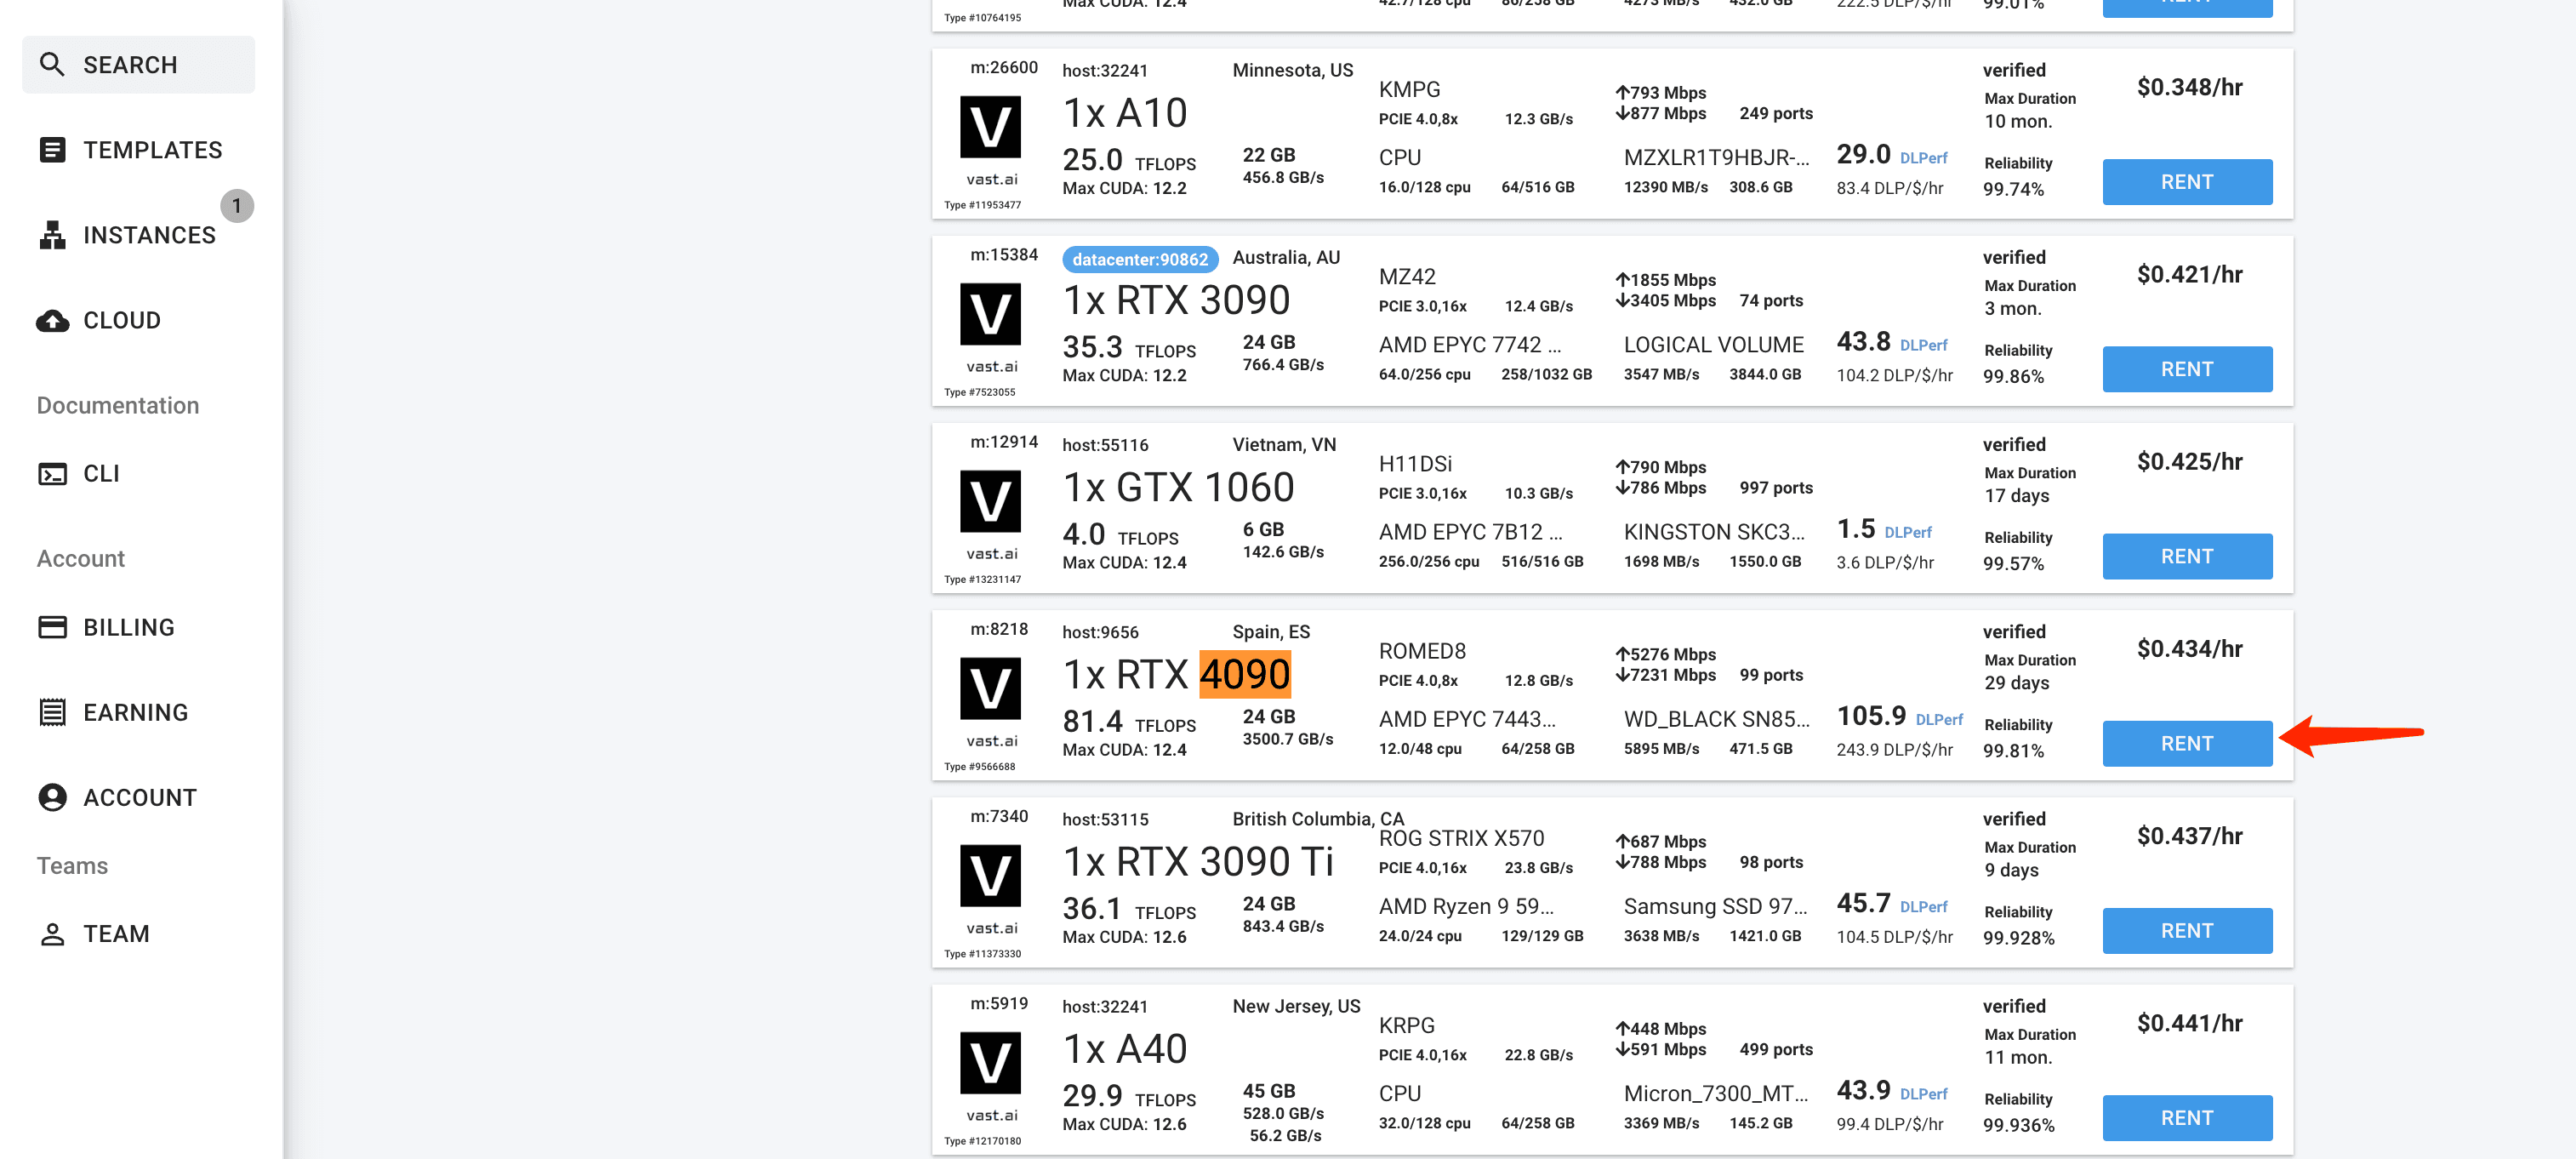
- Fire up Jupyter Notebook and Comfyui
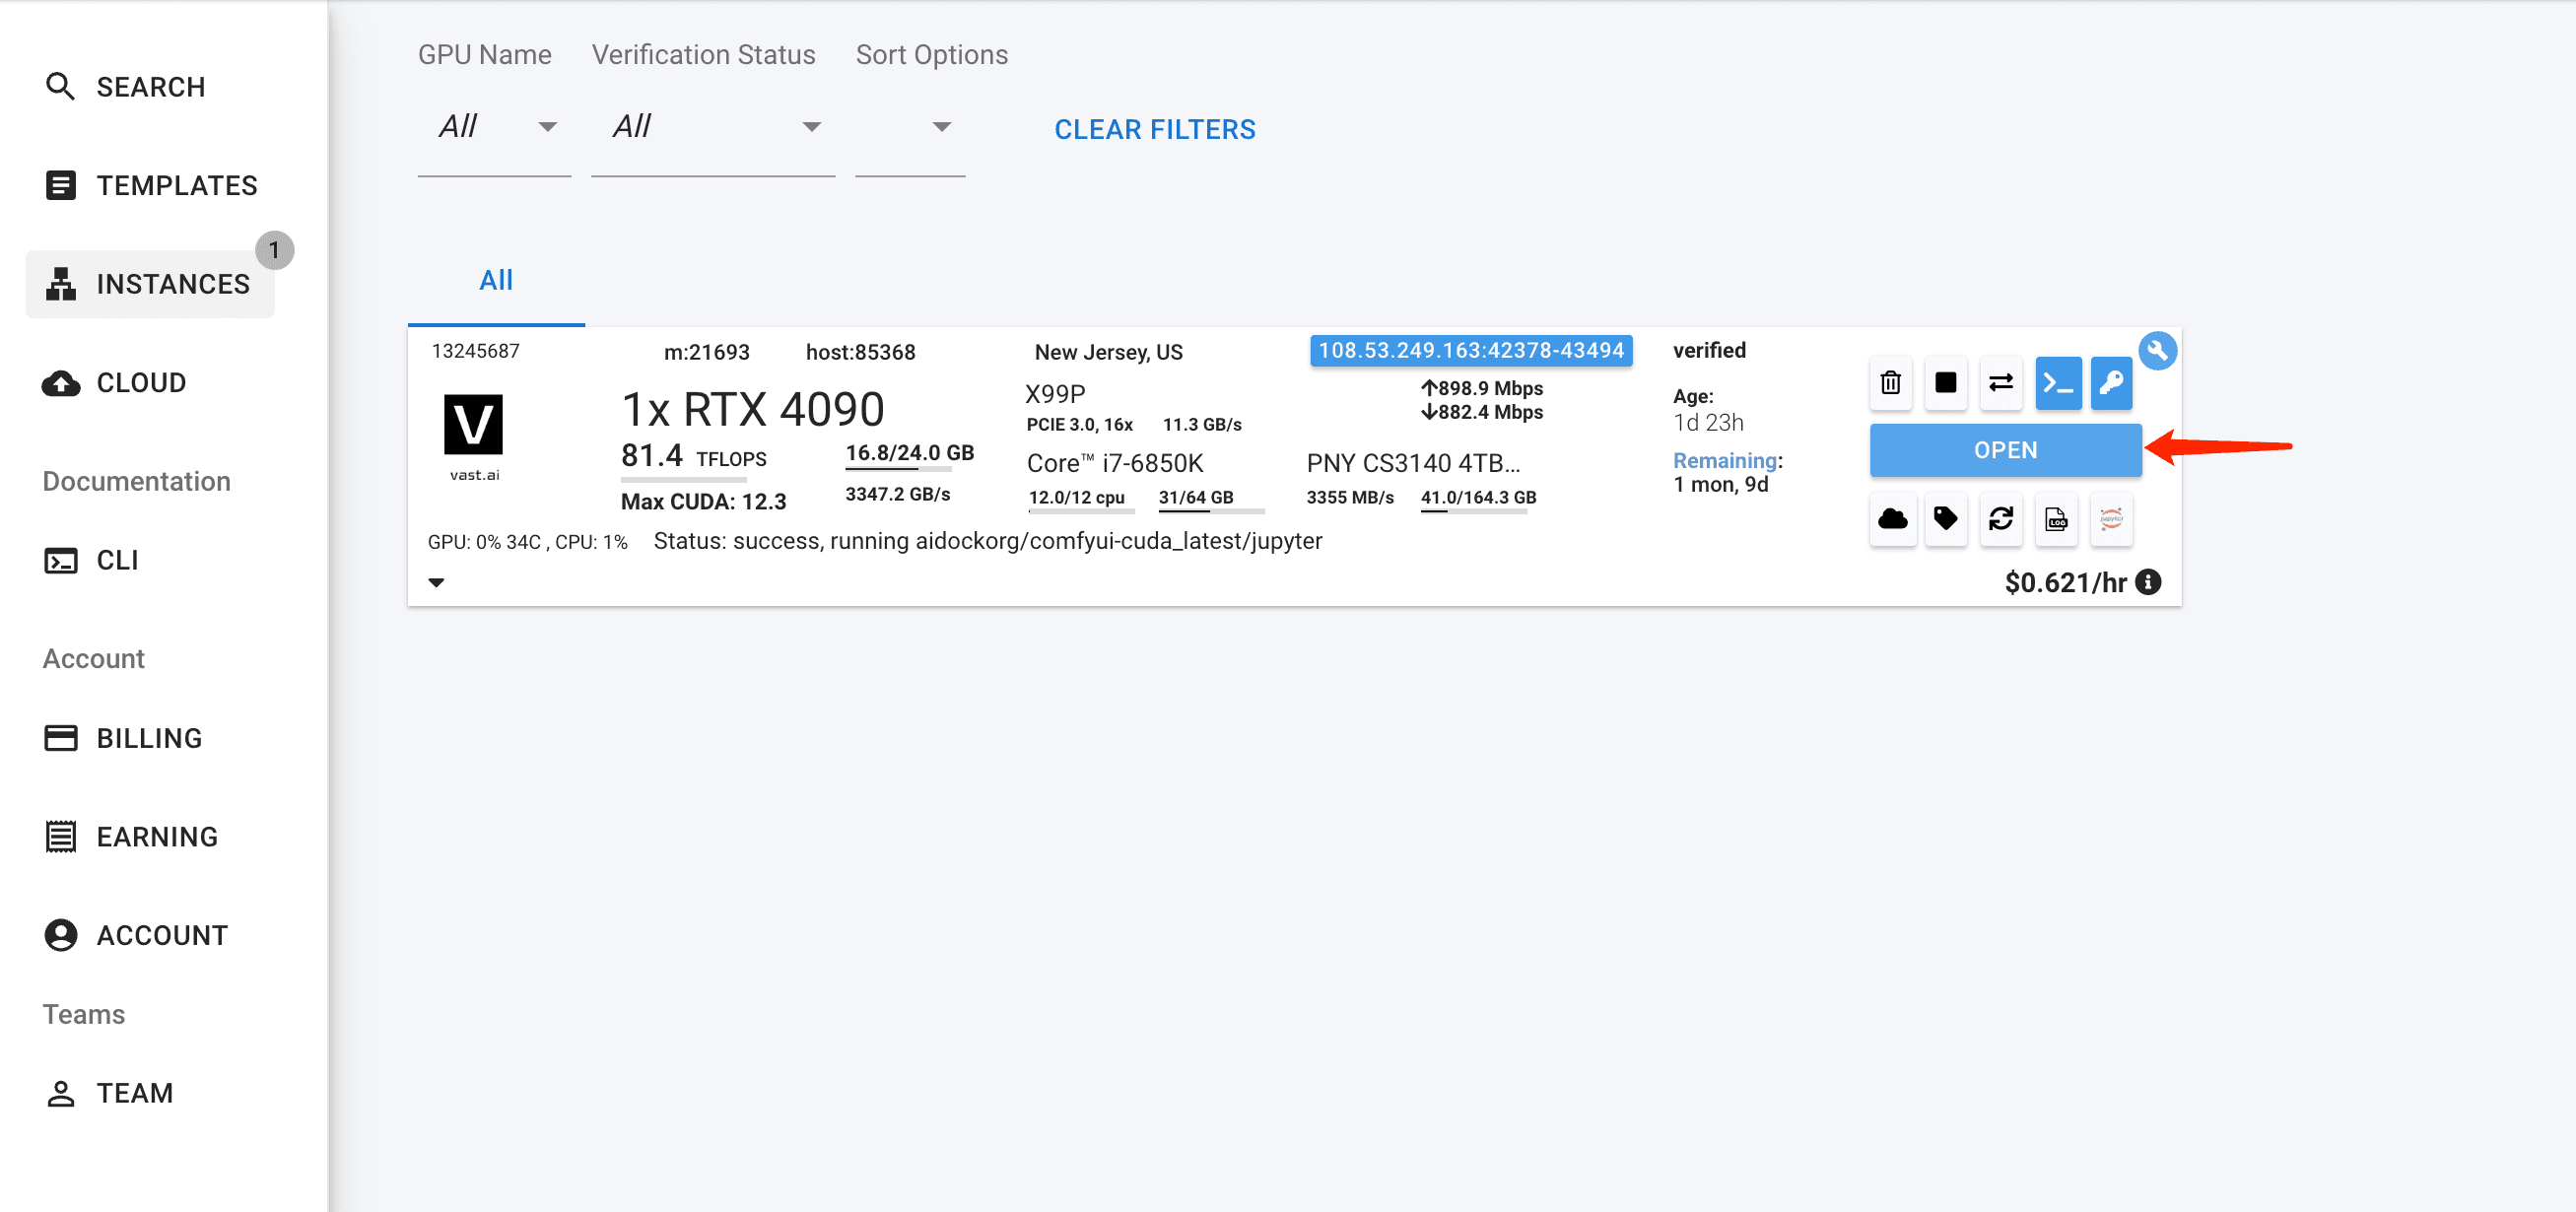
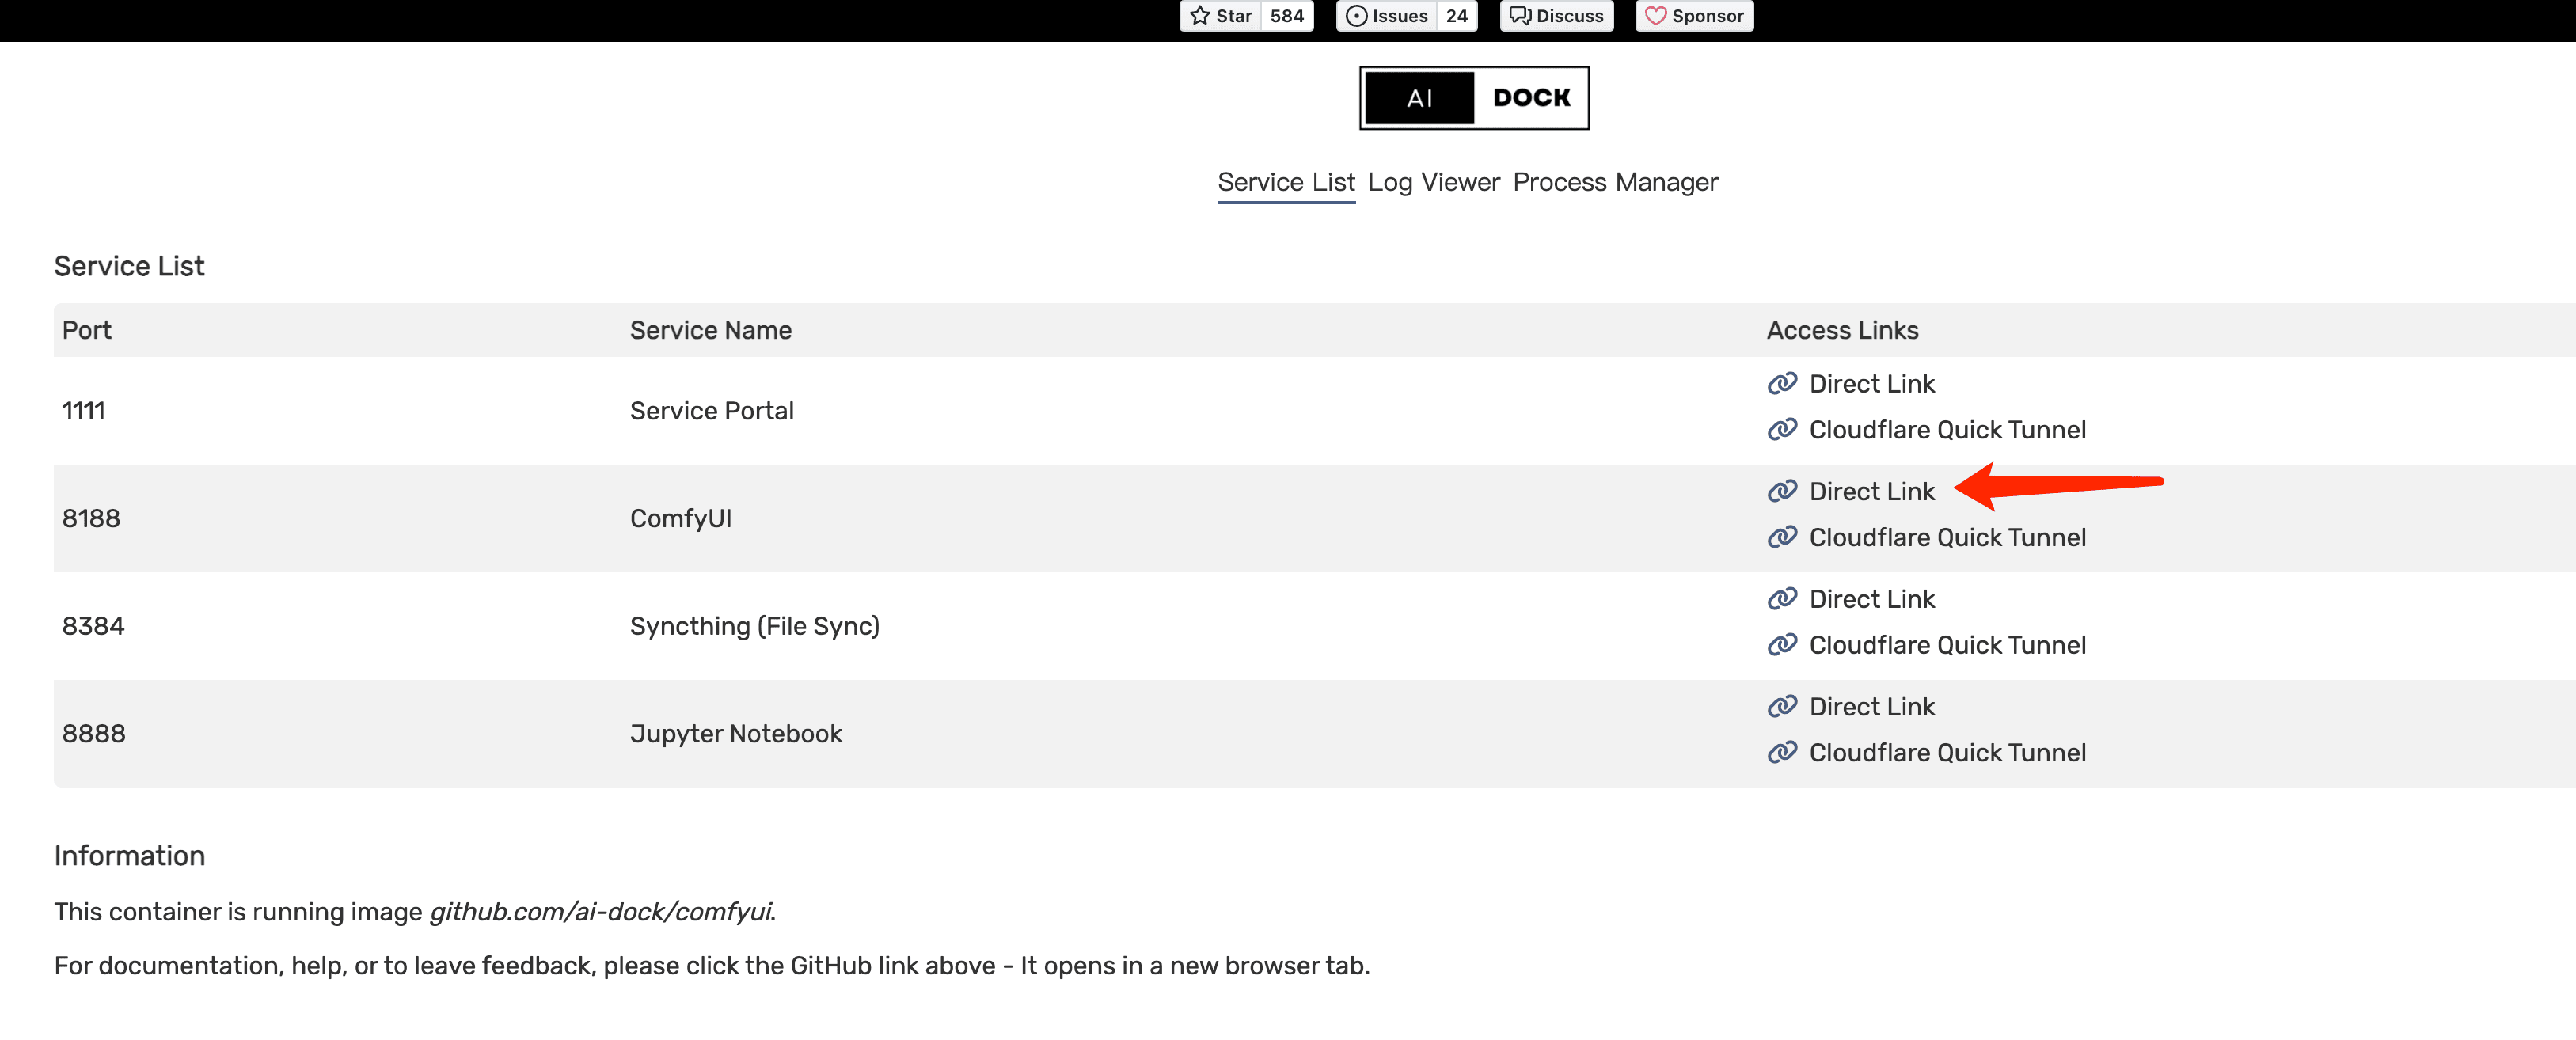
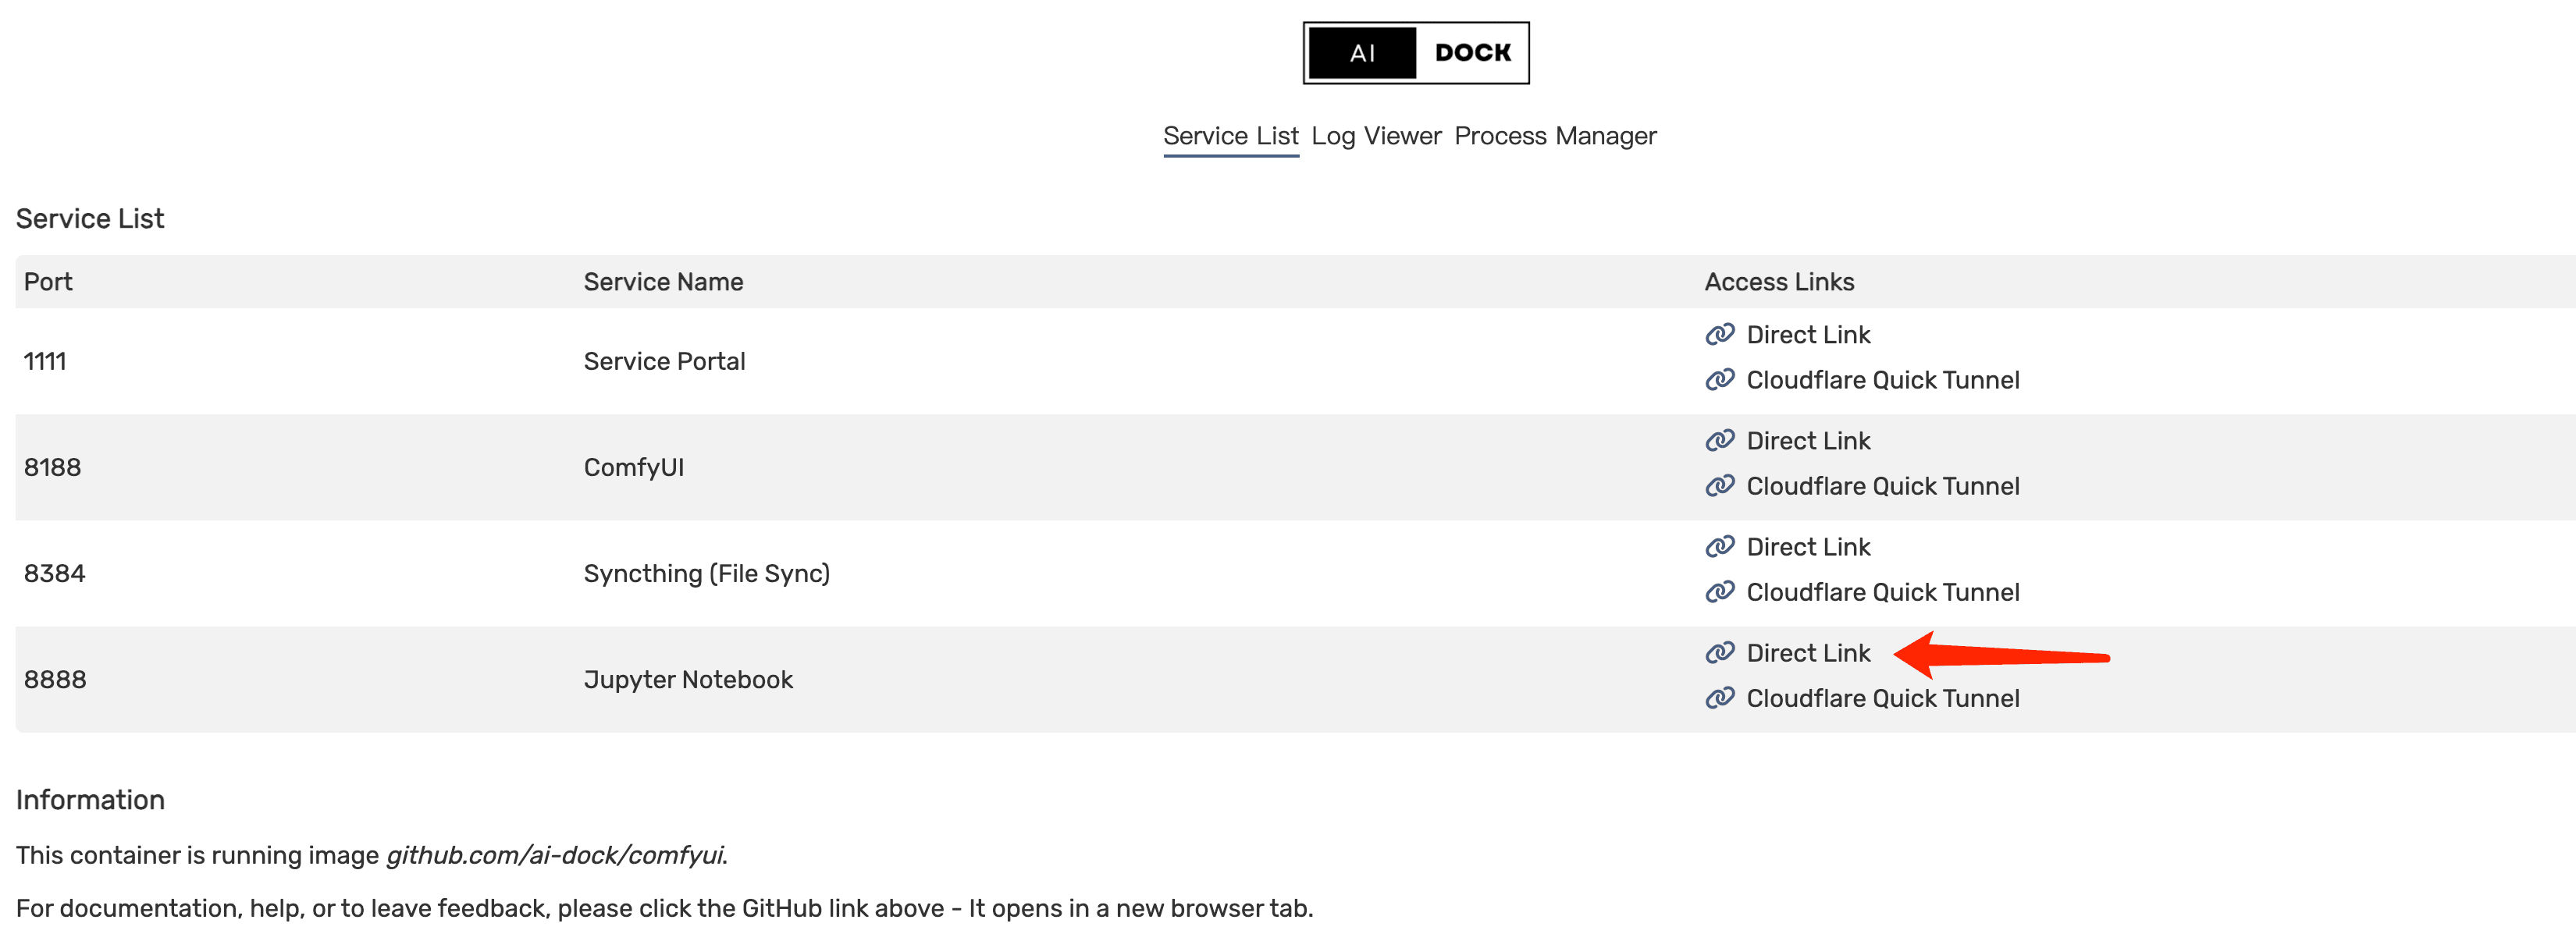
- Download model on Jupyter Notebook
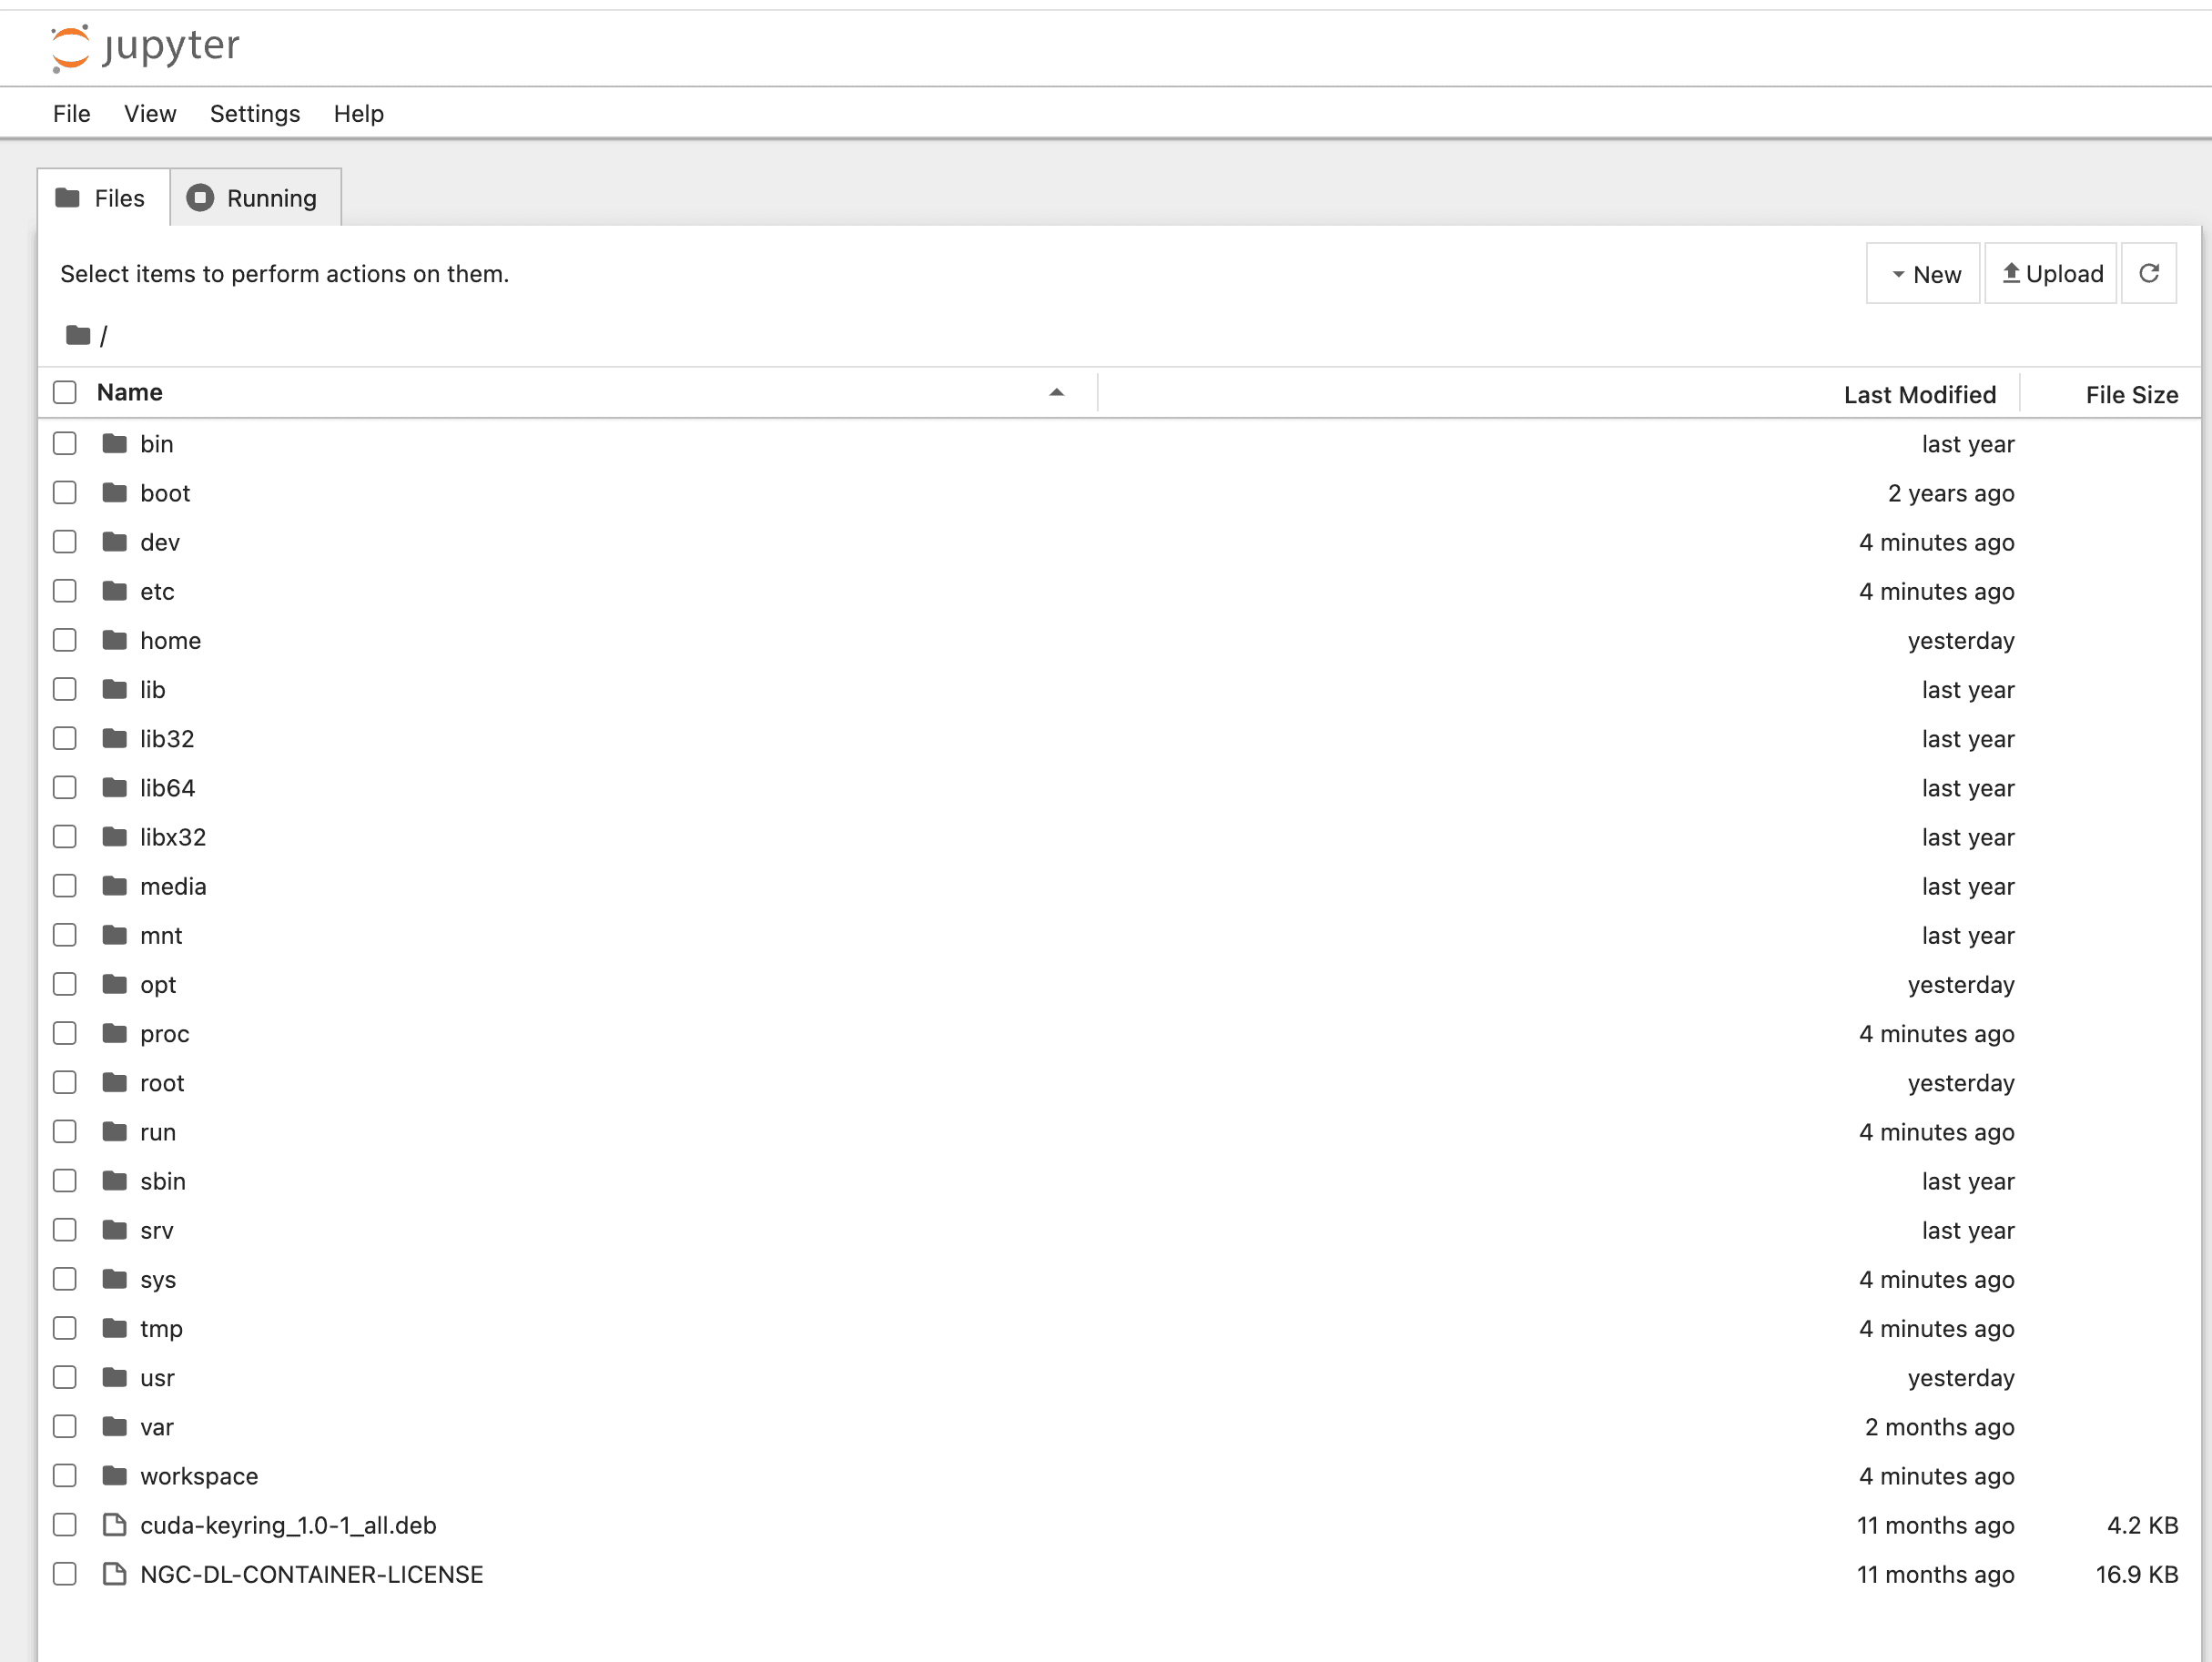
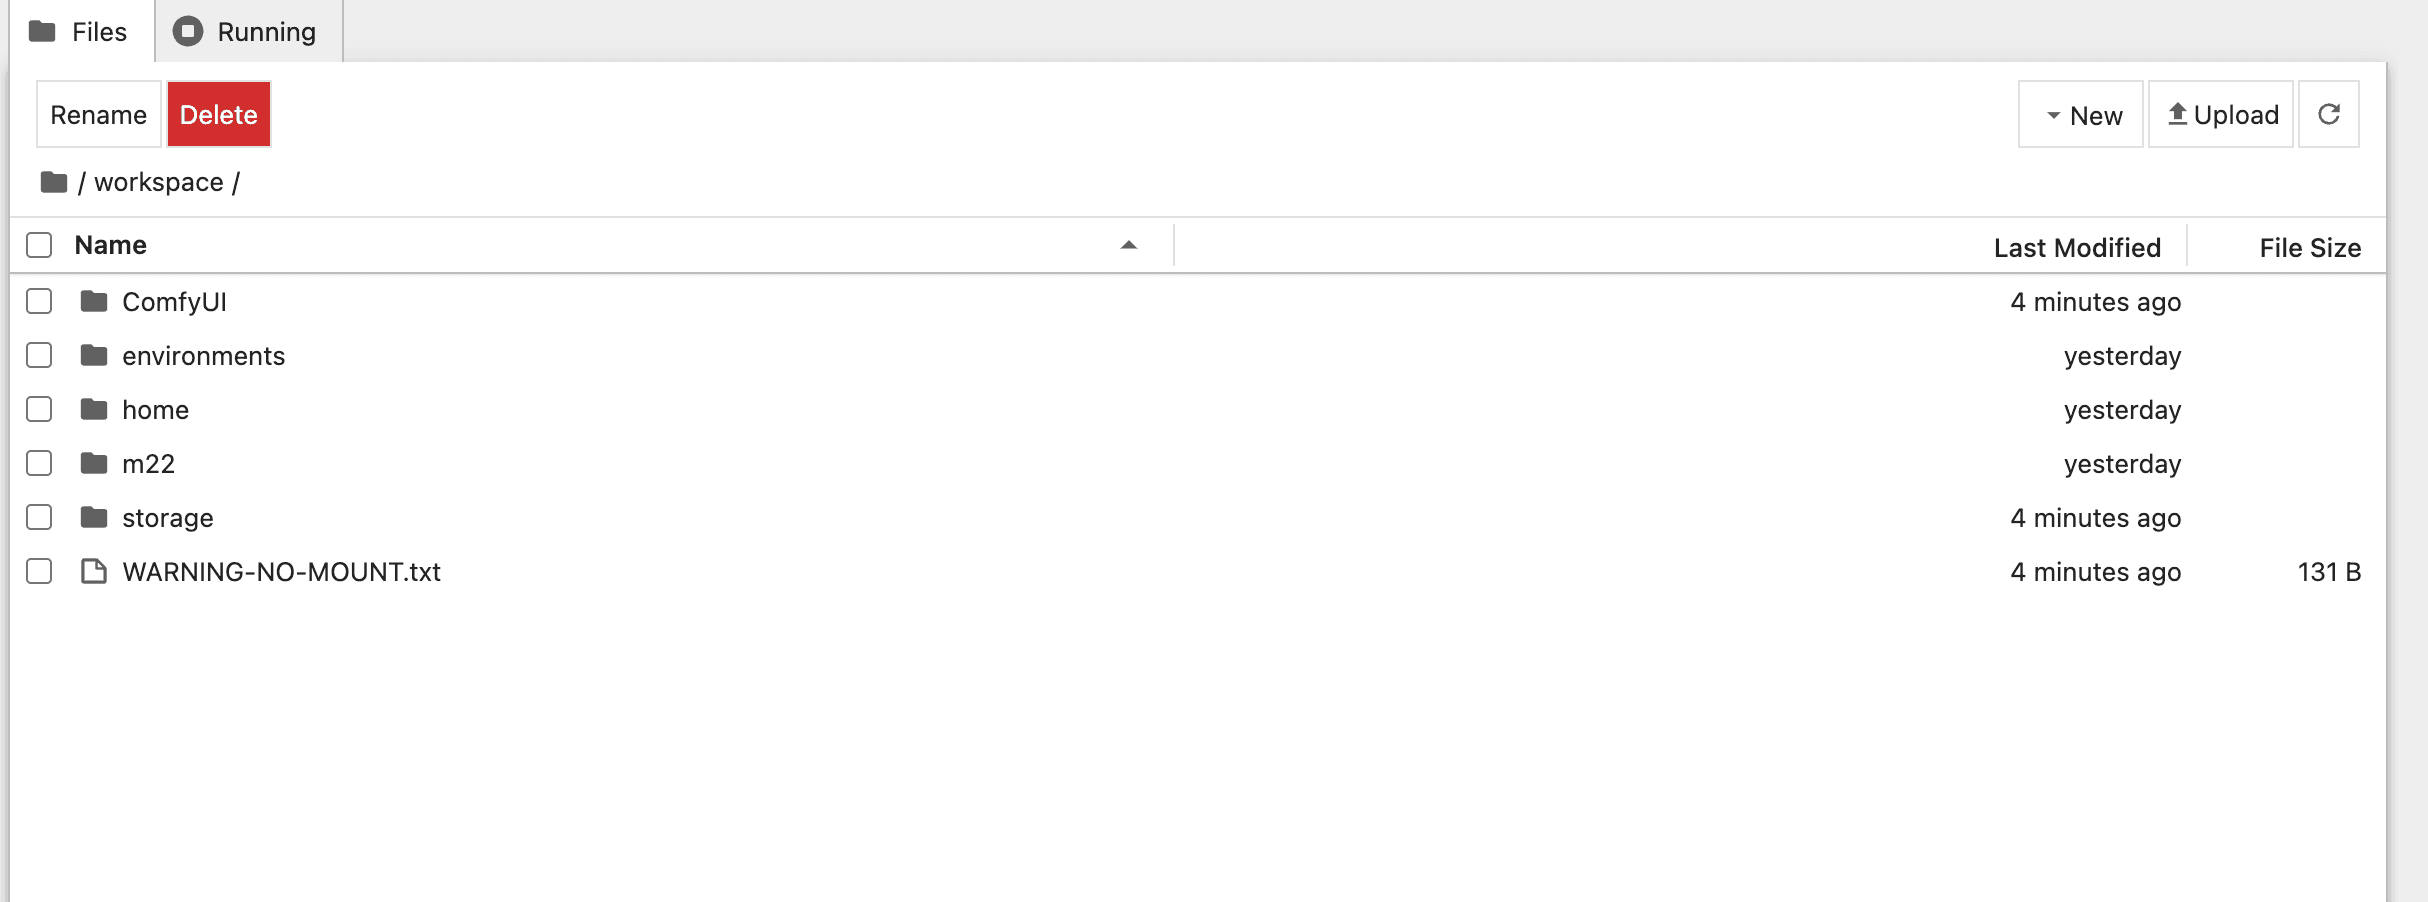
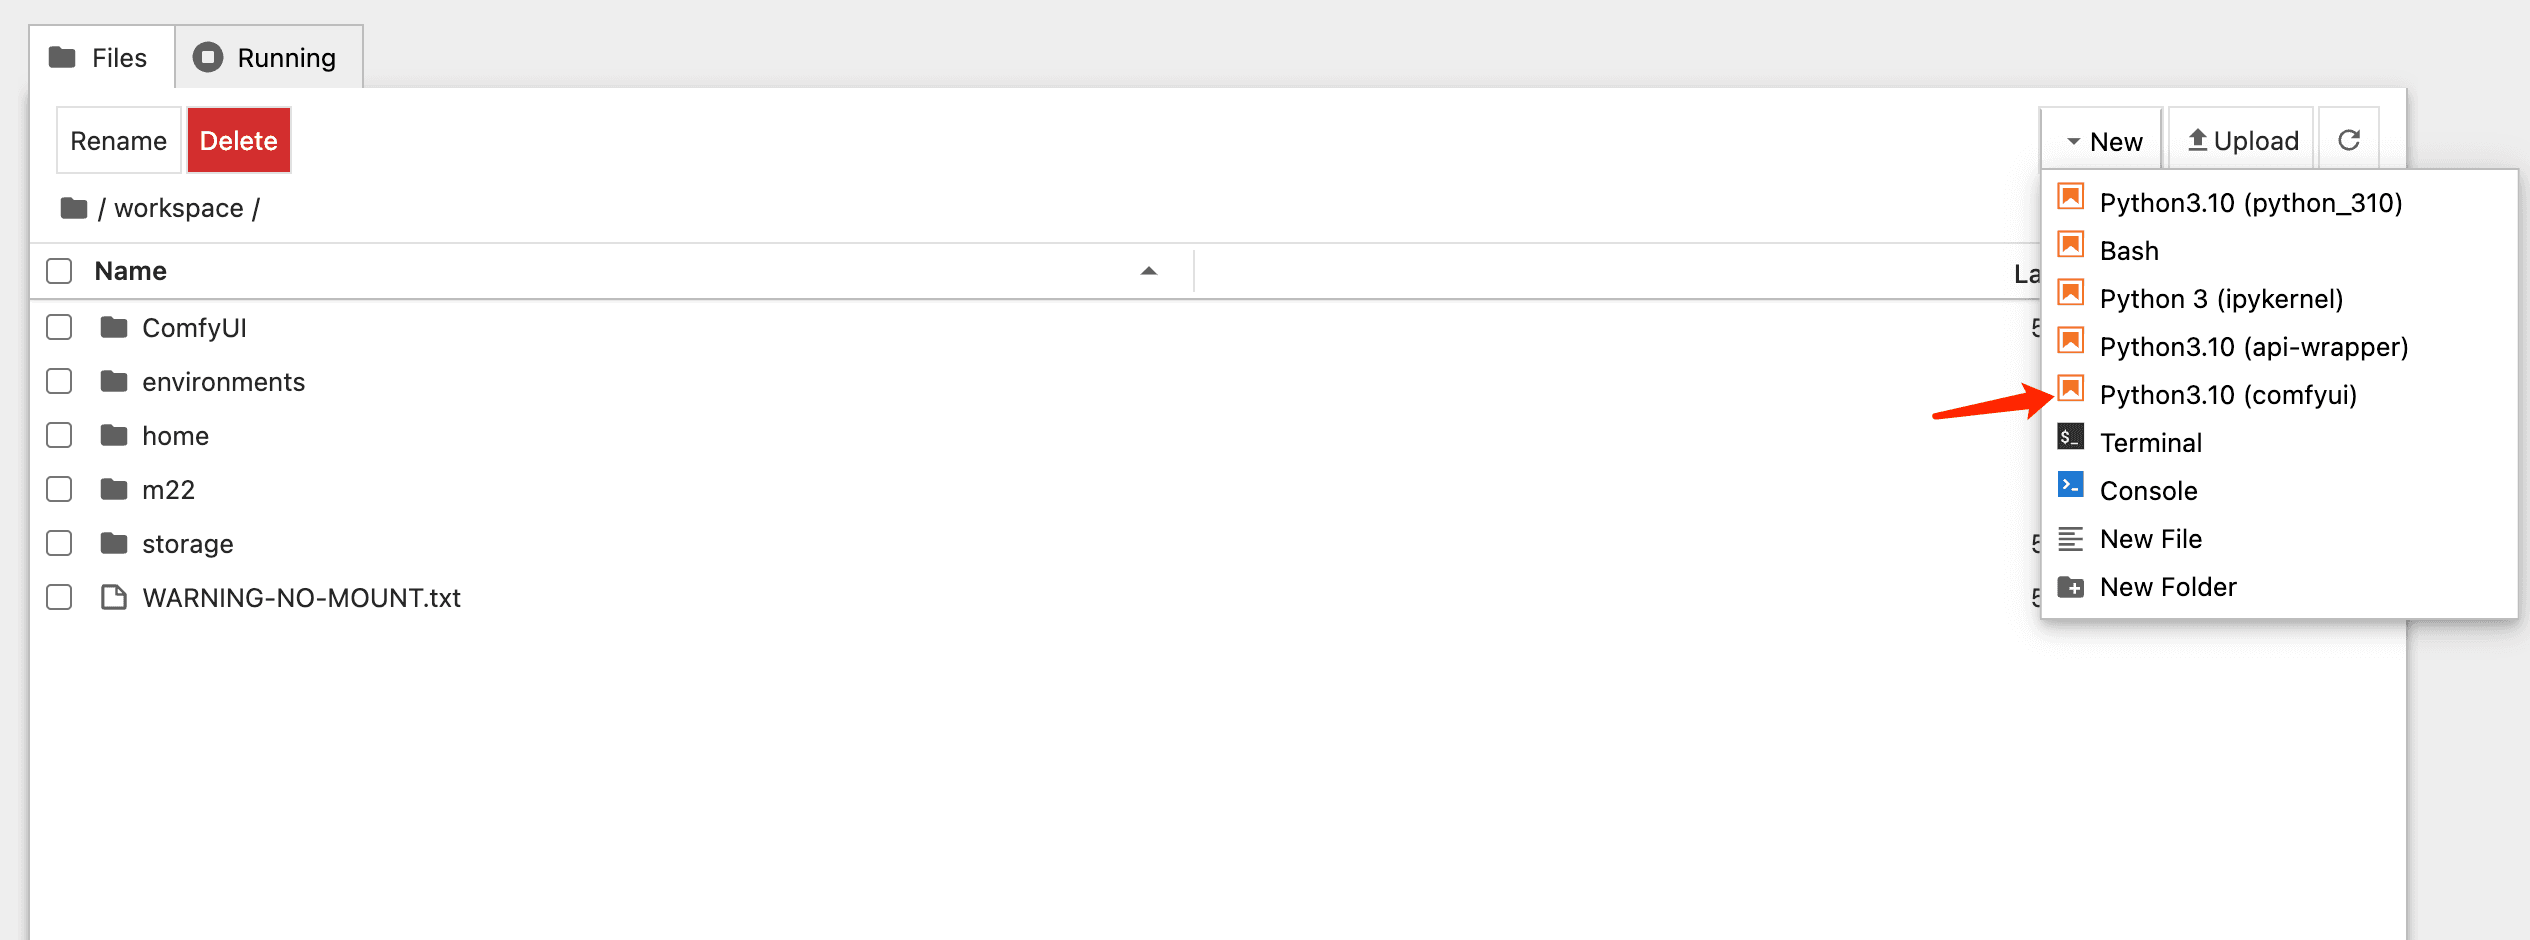

You can use below text to download the fp8 model.
!wget https://huggingface.co/XLabs-AI/flux-dev-fp8/resolve/main/flux-dev-fp8.safetensors -O /workspace/ComfyUI/models/unet
!wget https://huggingface.co/comfyanonymous/flux_text_encoders/resolve/main/t5xxl_fp8_e4m3fn.safetensors -O /workspace/ComfyUI/models/clip
!wget https://huggingface.co/comfyanonymous/flux_text_encoders/resolve/main/clip_l.safetensors -O /workspace/ComfyUI/models/clip
!wget https://huggingface.co/black-forest-labs/FLUX.1-dev/resolve/main/ae.safetensors -O /workspace/ComfyUI/models/vae
2. Prepping Your Images
Time to get organized:
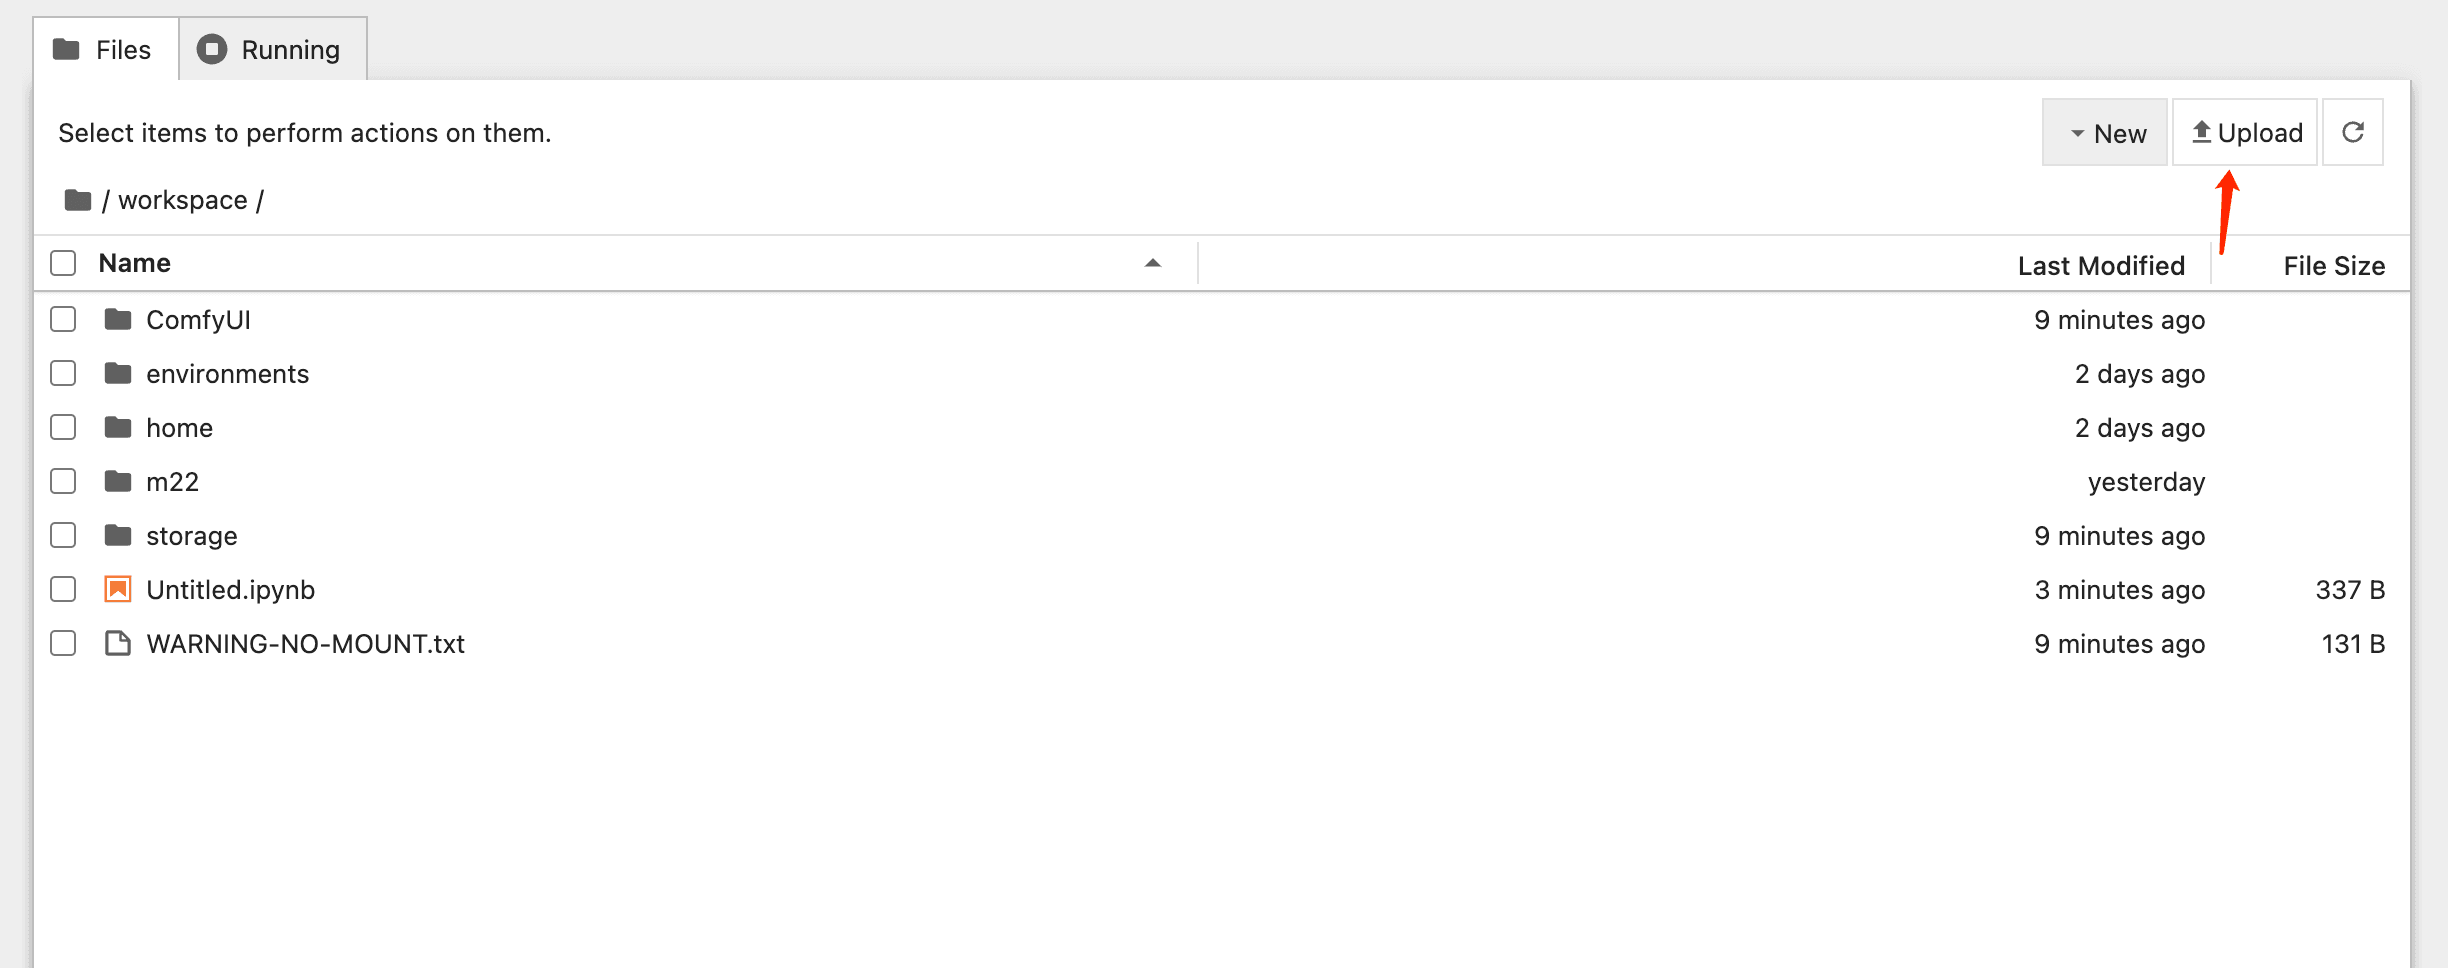
- Create a new folder, my folder named "m22"
- Upload your images
- (Optional)Create caption files (same name as image, but .txt)
Example:
m22/
  ├── m22_001.png
  ├── m22_001.txt
  ├── m22_002.png
  └── m22_002.txt
3. The Training Part
This is where the magic happens. Here's my tried-and-tested setup:
You can load my workflow for lora training.

Then setup the lora training configuration.
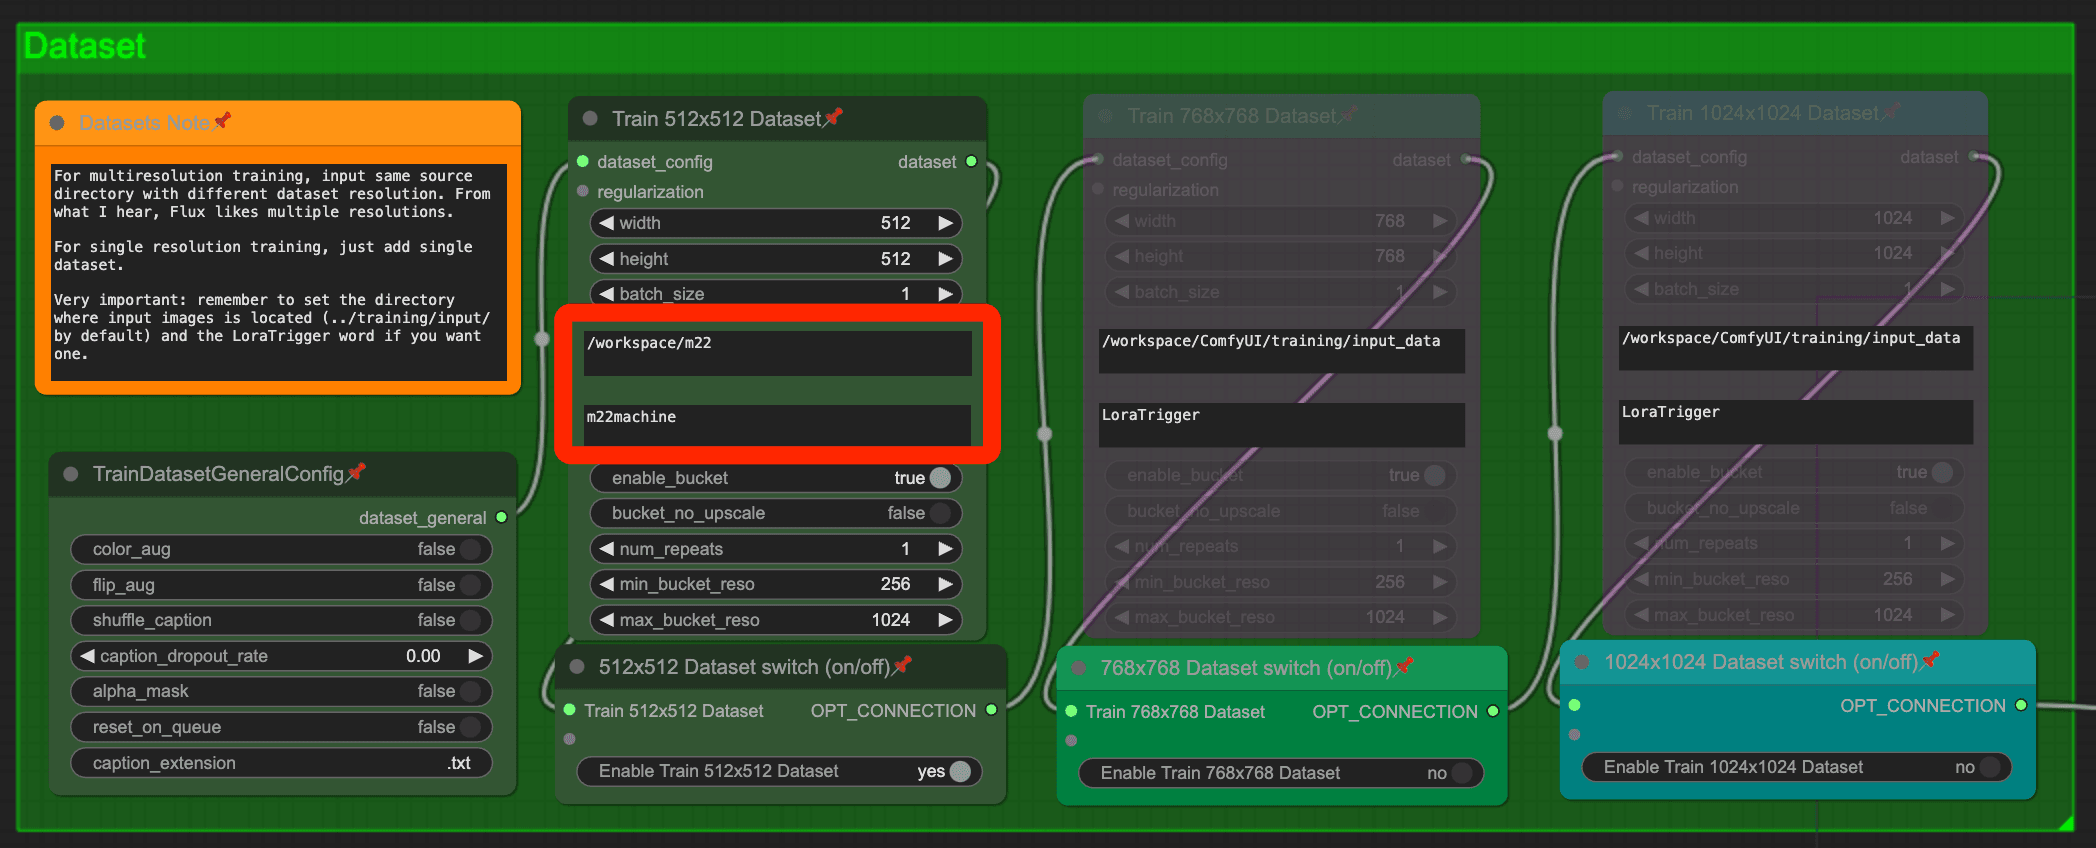
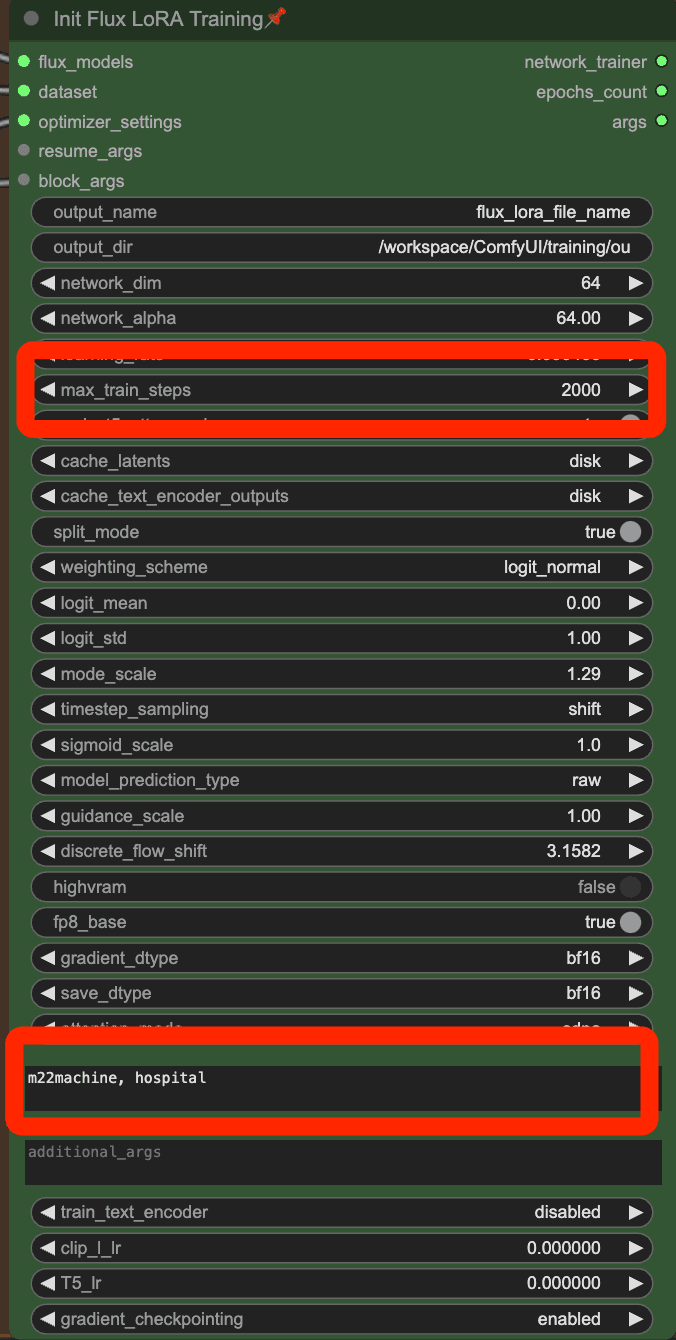
You need to set the output location to "/workspace/ComfyUI/models/loras"
Then you can click the queue button to start training about 30 minutes.
After training done, You can see the results in the workflow.
4. Using the lora model
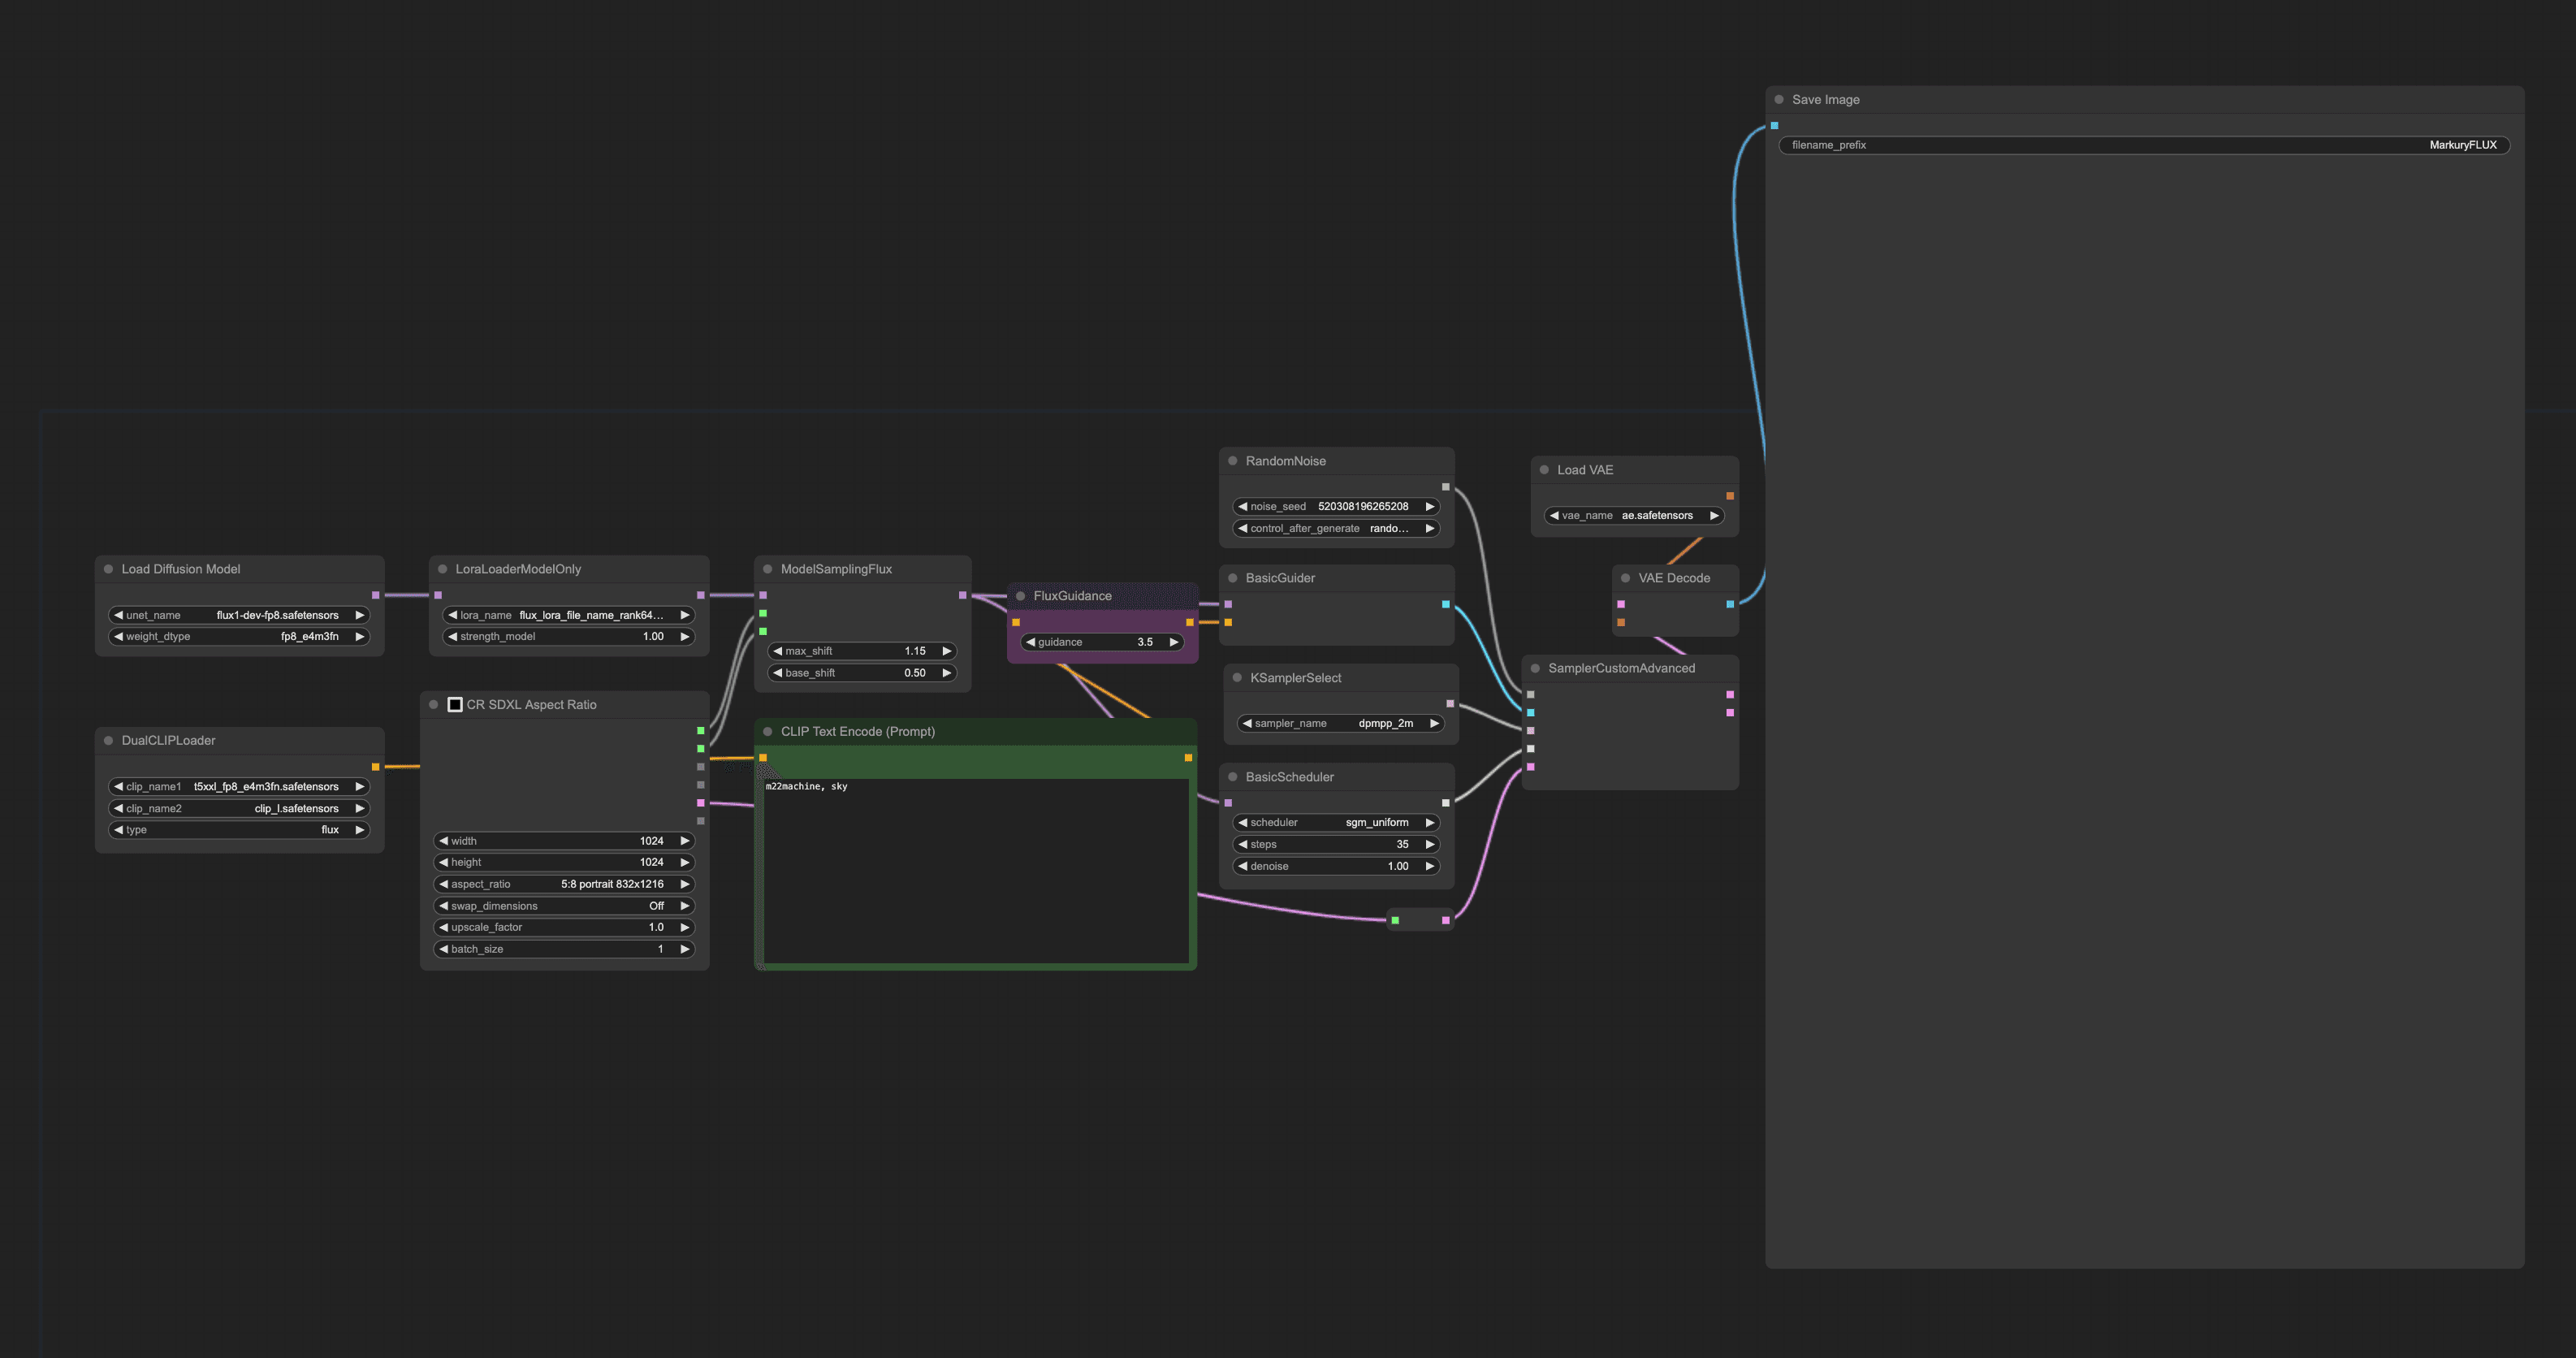
Once you're done training, you might want to use the lora model to generate the images you wanted.
You can use the below workflow to generate images using lora model.
What to Expect from Your Results
I've trained dozens of these models, and here's what I've learned:
- First results might look weird - that's normal
- Play with your prompts
- The trigger word is super important
- Sometimes less training is more
Quick Tips for Better Results
- Start with default settings
- Train for longer if results are blurry
- Use clear, consistent captions
- Keep your dataset focused
FAQs
Q: How long does training usually take? A: About 30 minutes-1 hour with a 4090.
Q: Can I use fewer images? A: You can, but results won't be as good. 10-20 is the sweet spot for object and 30+ is great for style.
Q: Do I need to use Vast.ai? A: Nope! Any GPU setup with enough VRAM works.
Final Thoughts
Training a LoRA isn't rocket science - it just needs a bit of patience and the right setup.
Remember: Start small, experiment lots, and have fun with it!
Got questions? Hit me up in the email. I personally answer every single one.
Related Posts

ComfyUI Basics: A Simple Guide for Beginners
Dive into ComfyUI basics with this straightforward guide. Learn about UNETs, VAEs, and more without the tech jargon. Perfect for AI image generation newbies!

How I Use SkyReels-A2 To Create Amazing AI Videos With Multiple Reference Objects
Discover how SkyReels-A2 is changing the game for video creators by allowing you to combine multiple reference images into one seamless video.