ComfyUI Basics: A Simple Guide for Beginners
Posted on October 9, 2024 - Tutorials
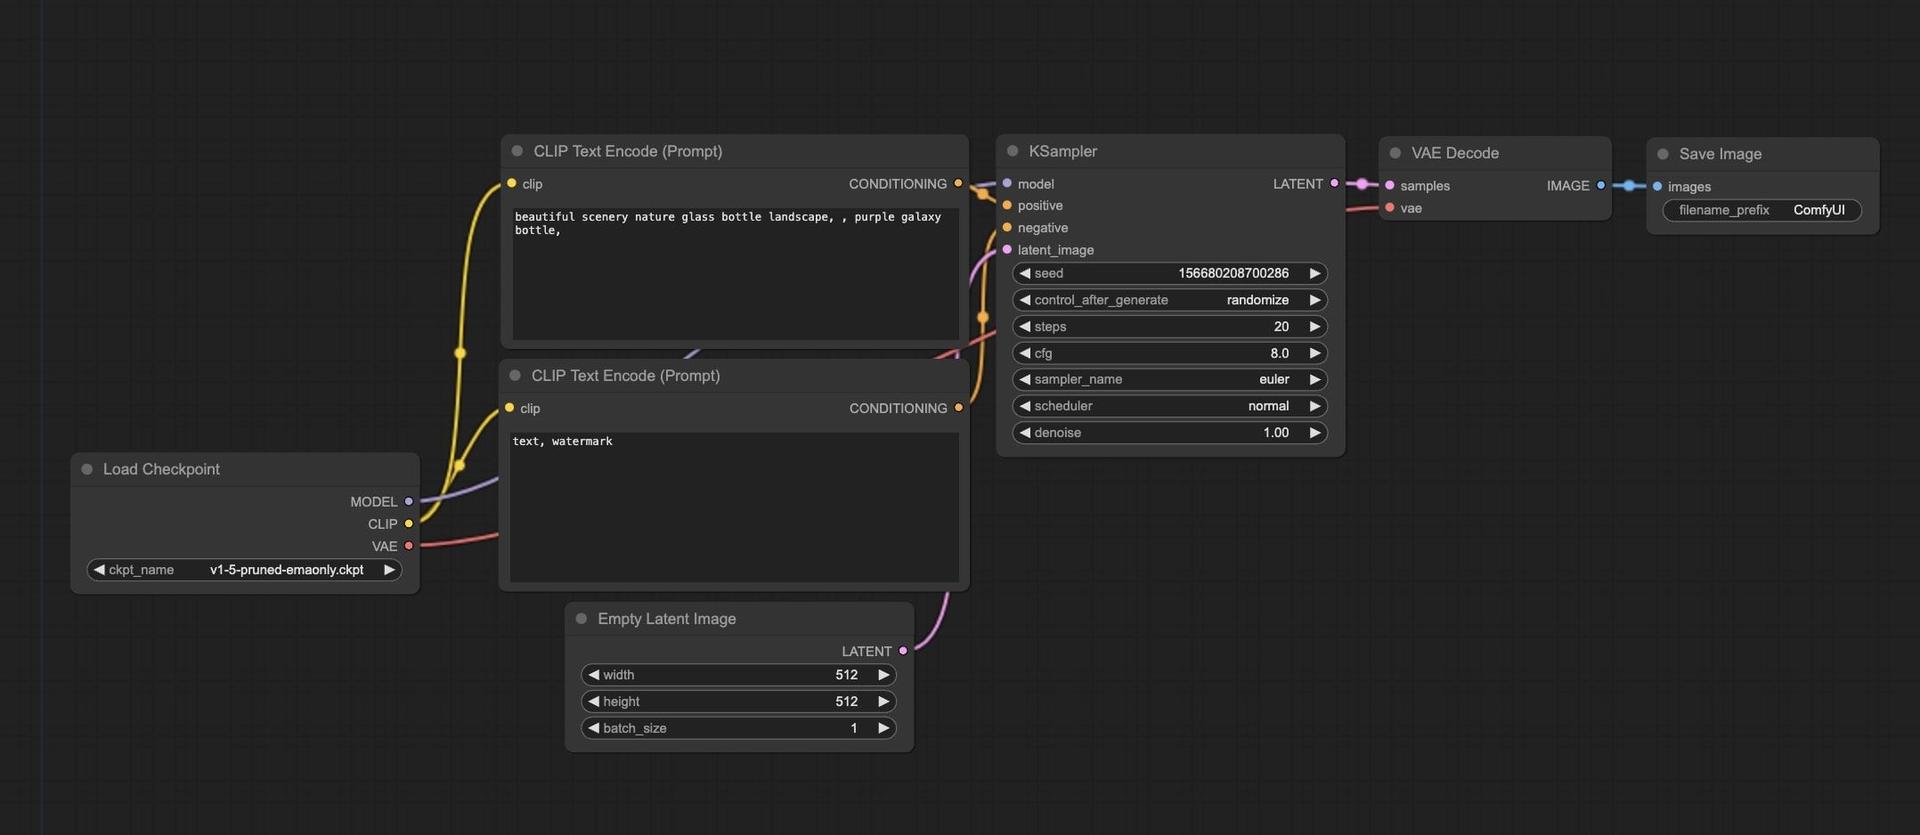
Hey there! Feeling lost in the world of ComfyUI? Don't sweat it. I've been there, and I'm here to break it down for you.
What's the Deal with UNETs?
UNETs are like the brain of ComfyUI. They're the main model that makes the magic happen.
Think of a UNET as a super-smart artist. You give it an idea, and it paints a picture for you. But instead of using brushes, it uses math. Crazy, right?
Here's the cool part: UNETs are really good at learning from just a few examples. It's like they have a photographic memory for art styles.
The shape of a UNET looks kinda like a "U" (shocker, I know). This shape helps it remember both the big picture and the tiny details when it's creating an image.
VAEs: The Image Compressors
VAE stands for Variational AutoEncoder. But forget that mouthful - let's call 'em image squishers.
These guys take your big, detailed image and squish it down into something called a "latent space". It's like taking a big, juicy burger and smooshing it into a tiny slider.
Here's the thing: this squishing process isn't perfect. You might lose a pickle or two along the way. That's why we say it's "lossy".
Pro tip: Don't keep switching between big images and squished ones. It's like repeatedly smooshing and un-smooshing that burger. Messy and not great for quality.
CLIP: Your Text-to-Image Translator
CLIP is like that friend who's really good at describing things. You tell CLIP what you want, and it turns your words into something the UNET can understand.
Here's a neat trick: the words at the start of your prompt carry more weight. So if you really want a red scarf in your image, put "red scarf" right at the beginning.
You can even adjust how much CLIP listens to each part of your prompt. It's like turning up the volume on certain words.
Tensors: The Building Blocks
Okay, this might sound a bit techy, but stay with me. Tensors are just a fancy way of saying "a bunch of numbers arranged in a specific way".
In ComfyUI, almost everything is a tensor. Images, prompts, you name it.
Want to see what a tensor looks like? Use the Tensor Shape Debug tool. It'll show you something like [[1,768,512,3]]. Don't panic! That's just telling you about the size and shape of your image.
Alright, let's dive deeper into some more ComfyUI basics. Buckle up!
Checkpoints: The All-in-One Package
Ever ordered a combo meal? That's kinda what a checkpoint is in ComfyUI. It's got your UNET, CLIP, and VAE all bundled up nice and neat.
Think of it like this: You've got your burger (UNET), your fries (CLIP), and your drink (VAE) all in one convenient package. Yum!
But here's the cool part - you don't always have to eat everything together. ComfyUI lets you use loader nodes to grab just the bits you want. It's like being able to order just the fries if that's all you're craving.
Latent Space: The Shrink Ray
Okay, picture this. You've got a massive, detailed photo of your dog. Latent space is like zapping that photo with a shrink ray. You end up with a tiny version that still kinda looks like your dog, but maybe his ears are a bit wonky.
This shrinking process is done by our pal VAE (remember the image squisher?). It's not perfect - you might lose some details, like the exact pattern of spots on your dog's nose.
Here's a pro tip: When you're working with images in ComfyUI, try to use sizes that divide evenly by 8. Why? Well, when the VAE does its shrinking thing, it divides everything by 8. If your numbers don't play nice with 8, you might end up with some funky results.
Prompt Conditioning: Mixing Your Image Cocktail
Alright, let's talk about prompt conditioning. It's like being a bartender, but instead of mixing drinks, you're mixing ideas for your image.
You've got three main ways to mix:
- Concat (short for concatenate): This is like layering your drinks. One idea goes in, then the next, no mixing.
- Combine: This is more like making separate mini-cocktails and then pouring them together.
- Average: Imagine taking all your ingredients, blending them up, and pouring out one smooth drink.
Each method gives you a different flavor in your final image. Play around and see what you like best!
Conditioning Timestamp Range: The Time Traveler's Tool
This one's pretty wild. Imagine you could control when different parts of your prompt kick in during the image creation process.
Let's say you want to make a picture of a village that changes from spring to winter. You could tell ComfyUI, "Hey, use the 'spring village' prompt for the first 20% of the creation process, then switch to 'winter village' for the rest."
It's like being a time traveler and a weather controller all at once. Pretty neat, huh?
Model Training Resolution: Size Matters
Different AI models are like different TV sets - they're made to work best at certain sizes.
Take SDXL, for example. It's like a fancy 4K TV - it's trained to work best with images that are 1024x1024 pixels. Using it for smaller images is like watching old VHS tapes on your new TV - it'll work, but it might not look as good as it could.
Want to test out different options? Set your seed value to 0. It's like hitting the shuffle button on your music player - you'll get a random mix each time.
Samplers and Schedulers: The Dynamic Duo
Samplers and schedulers are like the conductor and musicians in an orchestra. They work together to create your final image.
There's no "best" sampler or scheduler - it depends on what kind of music (or in our case, image) you want to make. But Karras is pretty popular, like that one hit song everyone seems to know.
Samplers come in two flavors:
- Predictable ones (like euler, dpmpp_2m, ddim, uni_pc): These are like classical music - structured and consistent.
- Stochastic ones: These are more like jazz - a bit more random and unpredictable. Great if you want your images to have a bit more "oomph".
If you're just starting out, try these:
- Schedulers: karras, exponential, sgm_uniform, normal
- Samplers: euler, dpmpp_2m, uni_pc, dmpp_2m_sde_ddpm, dpm_adaptive
Mix and match to find your perfect combo!
Steps: The Patience Game
Steps in ComfyUI are all about quality vs. speed. More steps? Better quality, but slower creation. Fewer steps? Faster, but might look a bit rough.
It's like cooking a stew. Sure, you could eat it after 10 minutes, but let it simmer for an hour and oh boy, that's where the magic happens!
Remember, ComfyUI isn't really "creating" images from scratch. It's more like it's chipping away at a block of noise, slowly revealing the image hidden inside. Just like Michelangelo said about his sculptures - the image is already there, ComfyUI just removes the extra bits!
CFG: The Backseat Driver
CFG (or Classifier-Free Guidance) is like a backseat driver for your AI. A high CFG value is like having a really bossy navigator - the AI will follow your prompt to the letter. Low CFG? That's more like a chill friend who's happy to take the scenic route.
High CFG: "Turn left NOW! No, your OTHER left!" Low CFG: "Eh, whatever looks good to you, man."
Use high CFG when you need something specific, like a product image. Go low when you want to see what crazy ideas the AI comes up with!
Random Seed: The Magic Number
The random seed is like the secret code that unlocks a specific image. Use the same seed, prompt, and settings, and you'll get the same image every time.
It's super useful for tweaking your creations. Found something you like but want to change just one thing? Keep the seed the same and you can make small adjustments without losing the overall vibe.
Phew! That's a lot of ComfyUI basics to take in. But don't worry if it all doesn't click right away. The best way to learn is to jump in and start playing around. Before you know it, you'll be creating amazing images and wondering how you ever lived without ComfyUI!
FAQs
Q: Do I need to understand all this to use ComfyUI? A: Nah, but it helps! Start playing around, and you'll pick it up as you go.
Q: What's the best sampler to use? A: There's no "best" - it depends on what you're after. But Karras is pretty popular.
Q: How many steps should I use? A: More steps = better quality, but slower. Start with 20 and adjust from there.
Remember, ComfyUI basics are just the start. The real fun begins when you start experimenting! So go on, give it a shot. You might surprise yourself with what you create.
You can provide us with any feedback at our email: [email protected]
Related Posts

How to train flux lora using comfyui on vast.ai?
Learn how to train your own LoRA model with FLUX.1 in this step-by-step guide. Perfect for beginners, includes GPU setup, dataset preparation, and expert tips.

How I Use SkyReels-A2 To Create Amazing AI Videos With Multiple Reference Objects
Discover how SkyReels-A2 is changing the game for video creators by allowing you to combine multiple reference images into one seamless video.